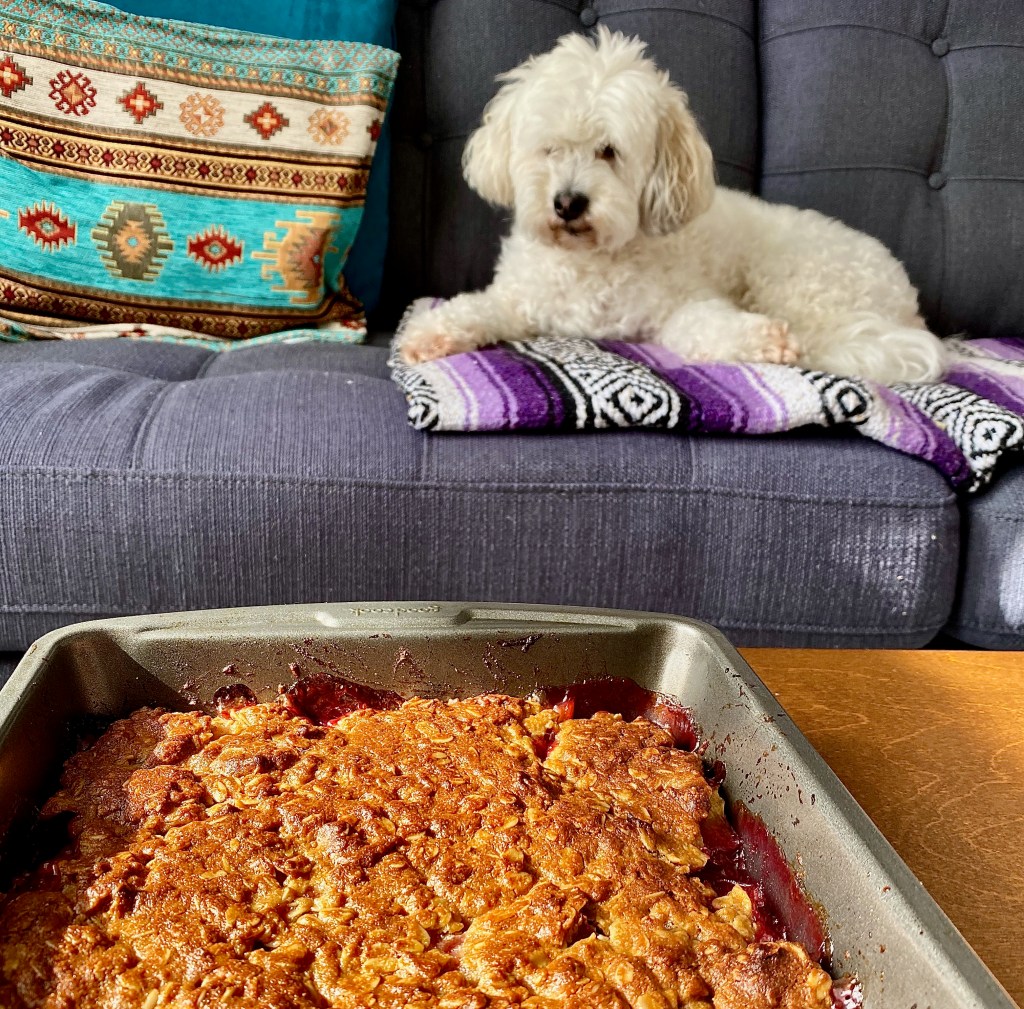
My artistic director and aspiring taste-tester Eli, overseeing a photo shoot
I love a good crisp. Or is it a crumble? Honestly, the differences are quite minor and I don’t care so long as it is delicious.
But if you really care about precise definitions…
A cobbler is fruit baked in the oven with some form of dough.
A crisp is fruit baked with a streusel-like topping that contains oats.
A crumble is essentially a crisp but traditionally without oats.
Warm, juicy fruit on the bottom, and crunchy buttery pieces on top. Typically served for dessert, but I swapped the sugar in the topping for honey, which sounds slightly more virtuous and makes this more justifiable for breakfast. Who am I kidding? Sugar is sugar. But these are the things I tell myself.
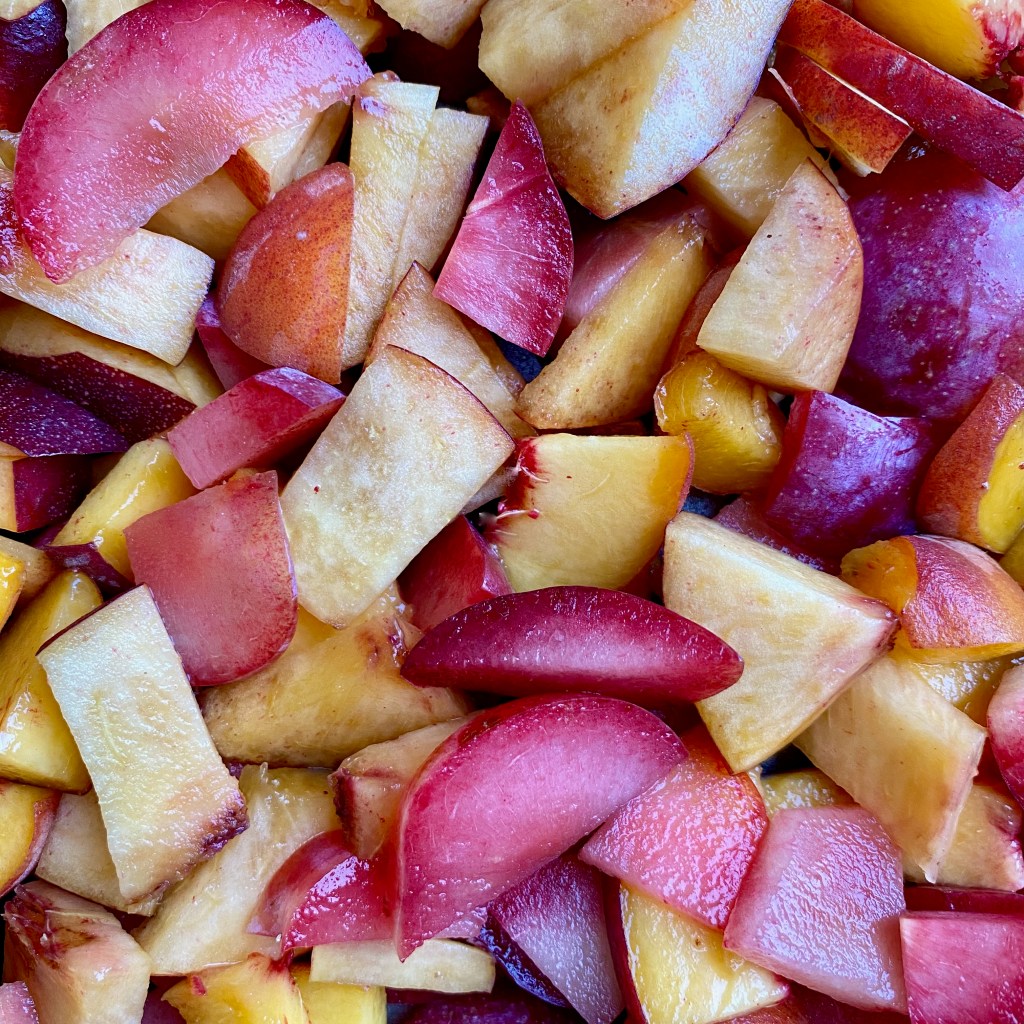
I used a mix of peaches and pluots (~1/2 pound of each), but you can use any stone fruit like nectarines, apricots, or plums. If you use cherries, have fun removing the pits!
If there are more than two in your household, I recommend doubling the recipe. This only last two days and there are two of us, so if you want more leftovers (yes, you do!) use 2 pounds of fruit and bake in a 9 x 13″ pan.
This is a perfectly acceptable meal for breakfast. If you think about it, it’s almost the same ingredients as granola but with the addition of cooked fruit. I serve with a large spoonful of Strauss Whole Plain European Style Yogurt but you can use whatever yogurt (or ice cream!) you prefer.
Ingredients
1 lemon
1 pound mixed stone fruit, pits removed and cut into quarters (or smaller)
1 tablespoon of sugar
¼ cup of honey
½ cup + 1 tablespoon of rice flour (all purpose would work)
¾ cup of old-fashioned rolled oats
⅓ cup of tahini
¼ cup of salted butter
1 teaspoon of cinnamon
Pinch of salt
Directions
Preheat the oven to 375 degrees F.
Finely grate zest from lemon into a large bowl and set aside. Cut the lemon in half and juice one half.
In an 8” X 8” baking dish, add the stone fruit, juice from ½ of the lemon, 1 tablespoon of sugar, and ½ tablespoon of flour. Stir to combine. If the mixture easily absorbs the flour (depends on how “juicy” your fruit is), add ½ tablespoon more. Stir again. Let this sit for 20 minutes.
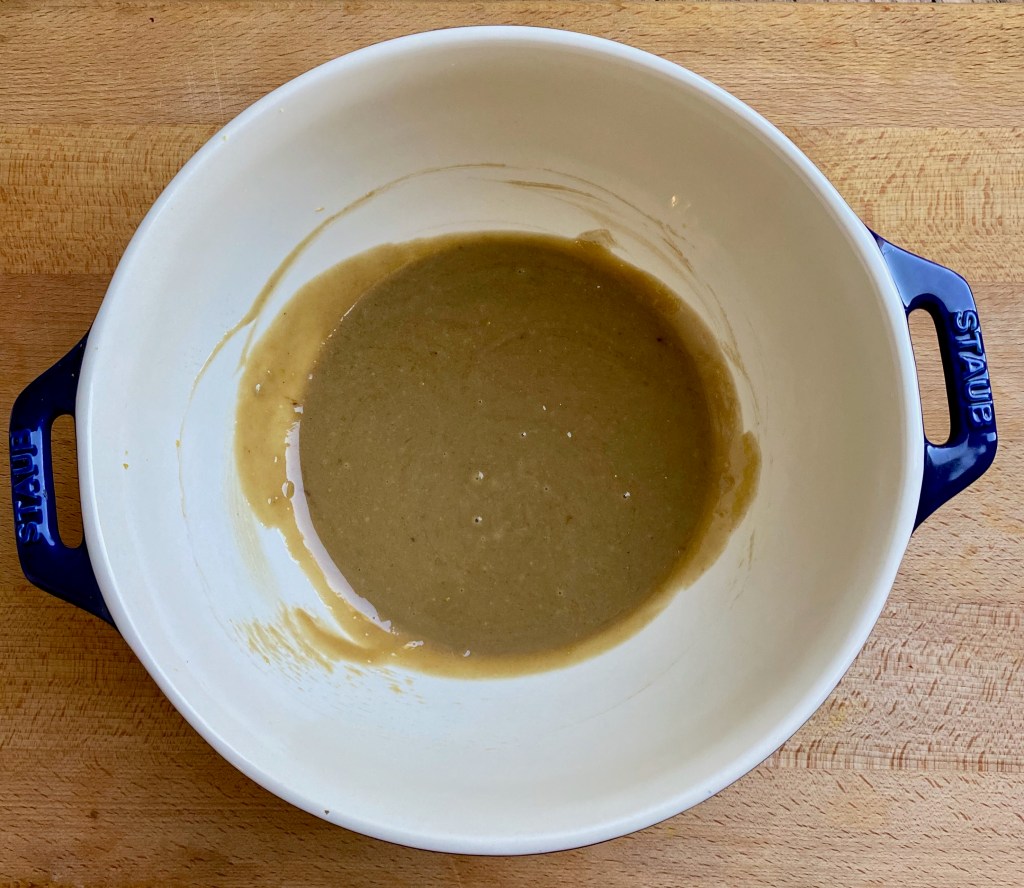
Melt butter in the microwave, and then add in a large bowl with tahini, lemon zest, honey, and cinnamon. Whisk together until smooth.
Add the oatmeal, flour, salt, and stir until well combined. It will be somewhat wet because of the tahini and honey.
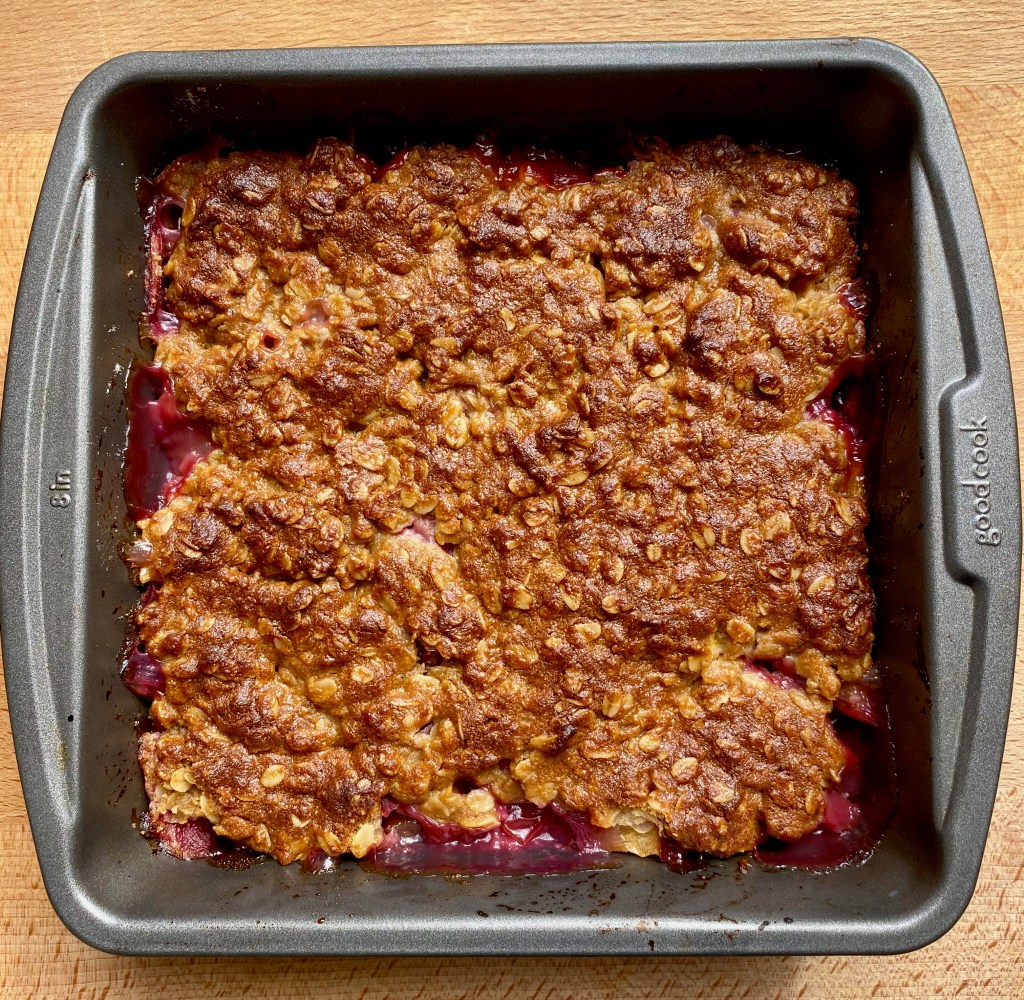
Drop the topping over the fruit and use a small spatula to cover the fruit completely with the topping. I try to smooth out the topping, but it doesnt have to be perfect.
Bake until the crumble topping is golden brown, about 35 minutes.
Let cool before serving. Serve with yogurt (or ice cream). If eating for breakfast, you can either warm it back up or eat it cold – either way is delicious!
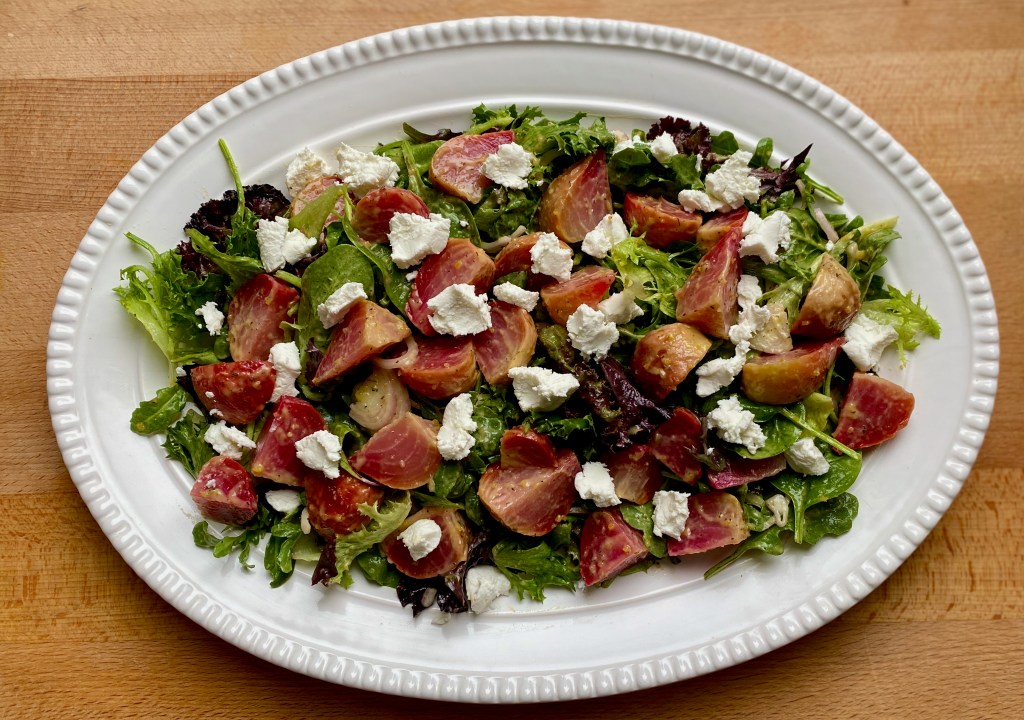
Beet and goat cheese salad is a classic, but it can be very basic. This one made with a preserved lemon vinaigrette turns it up a few notches so you’ll be dancing in the kitchen like Janet Jackson in Rhythm Nation.
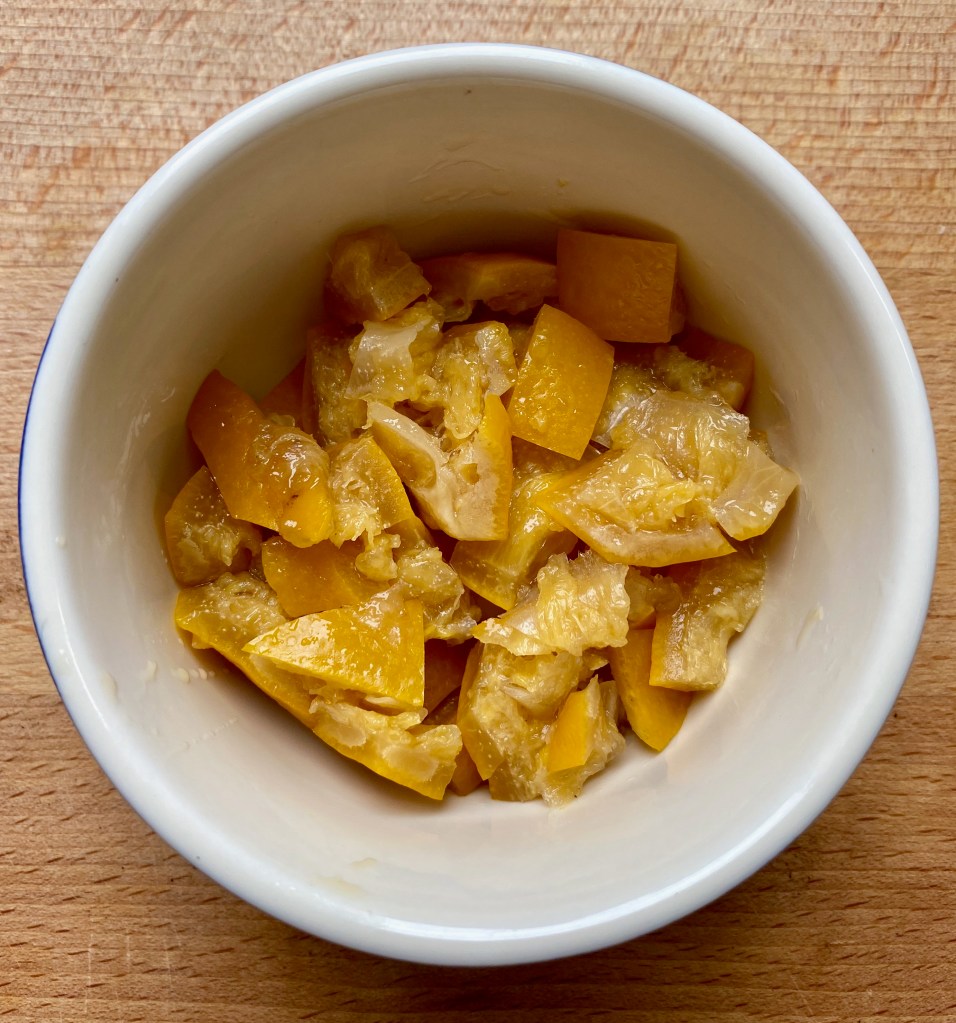
Preserved lemons are found in many Morroccon dishes like tagine, and add a pickle-y brightness. The lemons are brined in salt, so the rind becomes soft, tender, and edible. The sour punch of lemon mellows out when it pickles, but is still intensely lemony.
I was introduced to preserved lemons during my Ottolenghi challenge in 2019 (you can read more about “My year with Yotam” on the About Me page). He uses preserved lemons in a myriad of dishes such as harissa-marinated beef, chicken meatballs, and watermelon & feta salad. I also like to add preserved lemons to a pan of vegetables before roasting in the oven, or tossing uncooked into a grain salad.
You can buy preserved lemons at the grocery store, orif you’re really ambitious you can make your own!
The vinaigrette recipe makes more dressing than is needed for the beet salad. The vinaigrette is best stored in the fridge, but do allow it to come to room temperature before using. It can also go on top of any salad where you want lots of brightness or could even be a good on a piece of salmon!
Ingredients
For the preserved lemon vinaigrette
2.5 oz preserved lemon
½ cup olive oil, plus 1 teaspoon for roasting the beets
¼ cup lemon juice
1 tablespoon honey
1 garlic clove, smashed
freshly ground black pepper
1 teaspoon dried thyme
pinch of salt (if needed)
For the beet and goat cheese salad
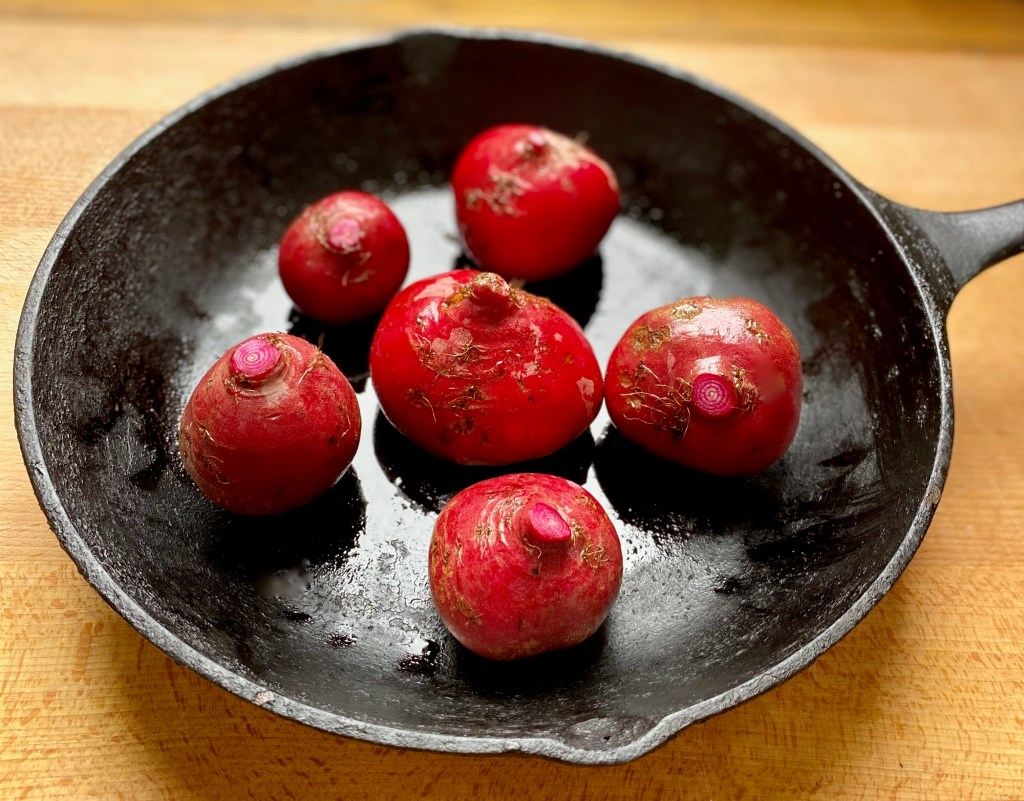
1 pound beets
10 ounces mixed baby salad greens
2 ounces goat cheese, broken into small pieces
1 shallot, thinly sliced
Directions
Preheat the oven to 425 F. Scrub the beets, but keep the skin on. Put beets on a cookie sheet or cast iron pan, rub with 1 teaspoon of olive oil.
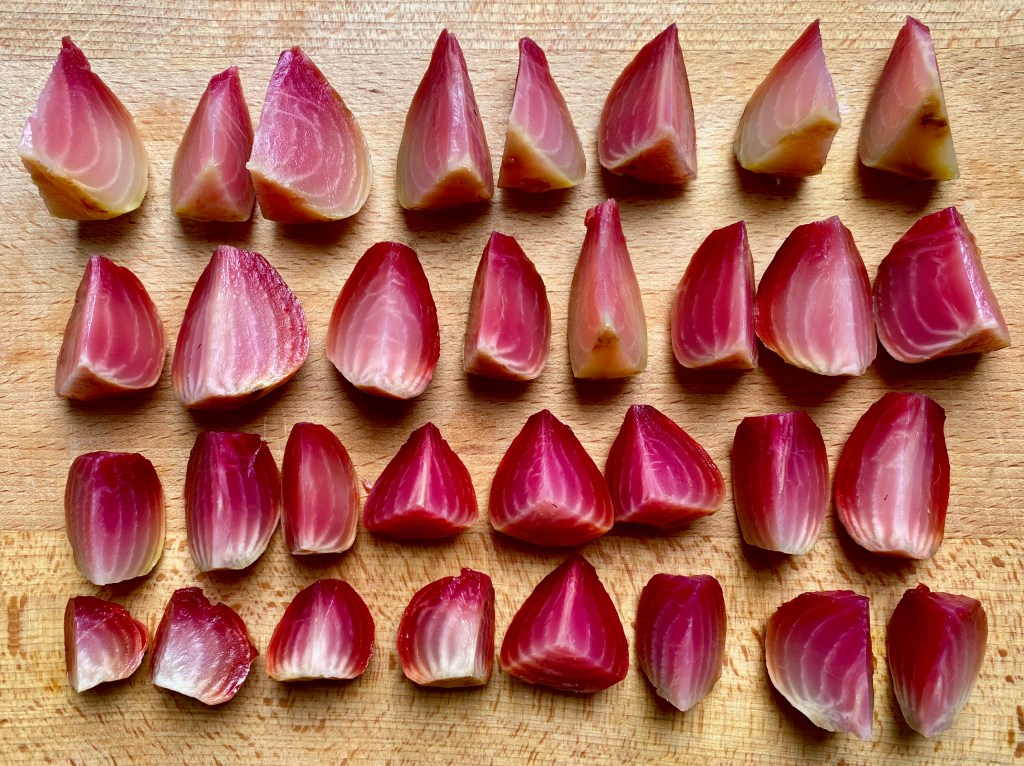
Roast in the oven for 40-45 minutes, or until a knife tip can easily slide inside the beet. Wait for the beets to cool, then remove the skin, and slice into quarters.
Make the preserved lemon vinaigrette: Remove any seeds from the preserved lemon, and roughly chop.
Add lemon, lemon juice, olive oil, honey, garlic, thyme, and pepper to an immersion blender, regular blender, or food processor and emulsify. Taste the vinaigrette for balance. Is it too salty? Add a bit more honey. Too sweet? Add some salt. When the taste is balanced, set aside.
Add the baby mixed greens, shallots, beets, and goat cheese to a large bowl. Pour the ½ of the vinaigrette over the salad and gently toss to combine. Serve immediately.
Where did the broccoli go to have a few drinks? The salad bar!
Thank you Deb from Smitten Kitchen for this recipe! Deb is an incredible writer, recipe creator, and a huge inspiration for this blog.
I received a signed copy of The Smitten Kichen Cookbook many years ago and it’s one my go-to’s, as evidenced by its many stains and bent pages. It’s always a good sign when a cookbook shows some wear and tear. Be skeptical of anyone who keeps their cookbooks in pristine condition!
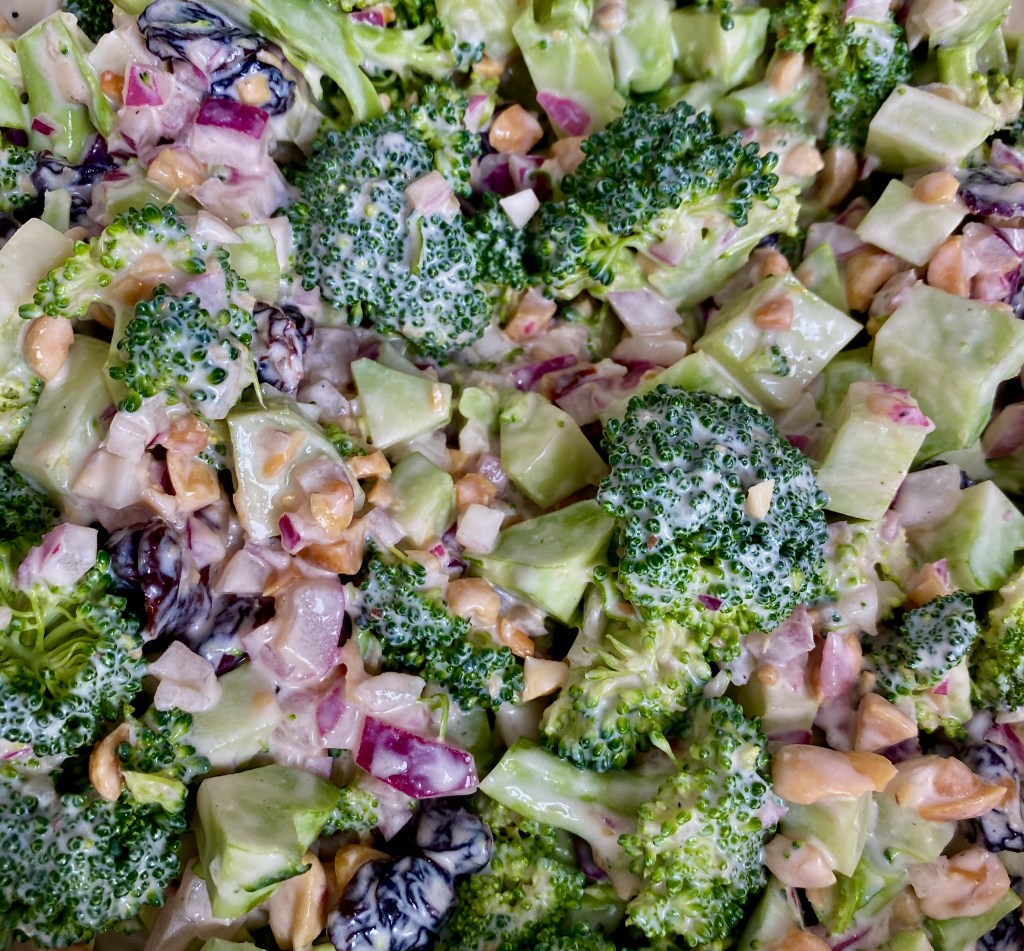
I made this recipe on a whim a few years back, and it has steadily stayed in our regular rotation of salads that go well with a piece of roast chicken, a burger, or some sausages. The combination of crunchy broccoli, tangy dressing, sweet raisins, and salty peanuts is irresistible.
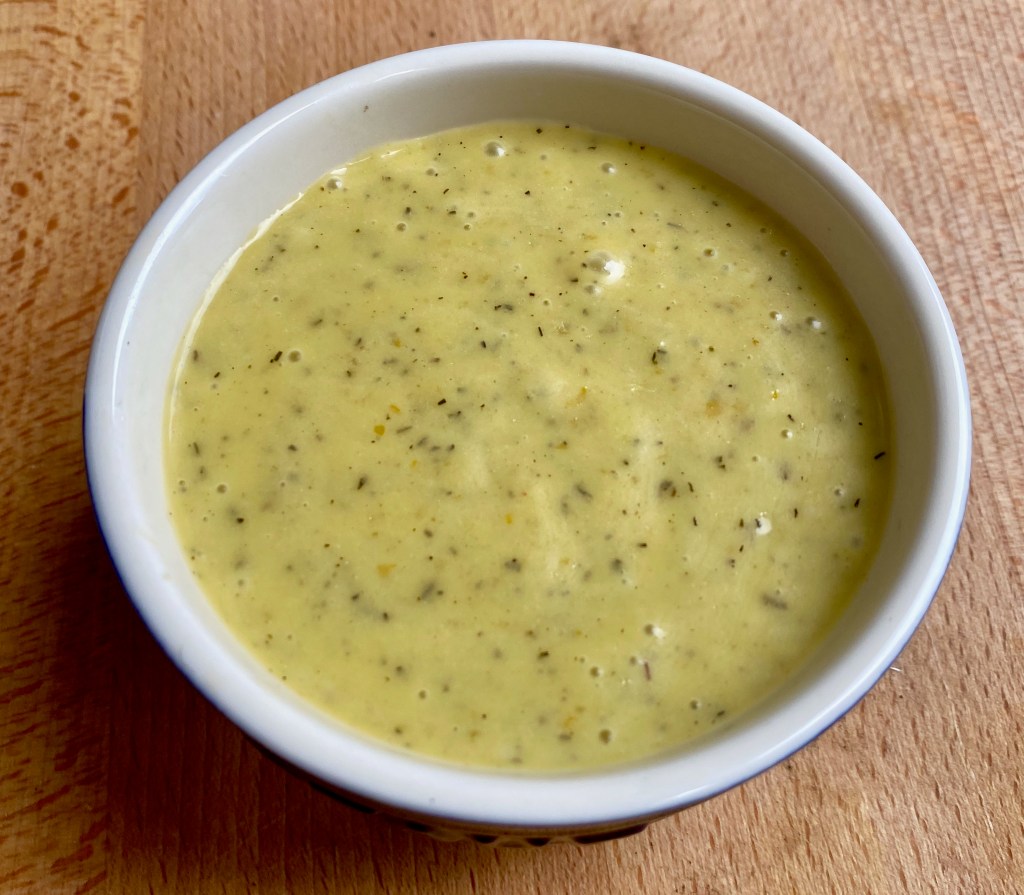
Generally, salads with a bunch of mayonnaise are not my jam (or jelly) because they can be goopy or lack flavor. This salad is an exception to the rule because there is so much texture and tang with the buttermilk and vinegar.
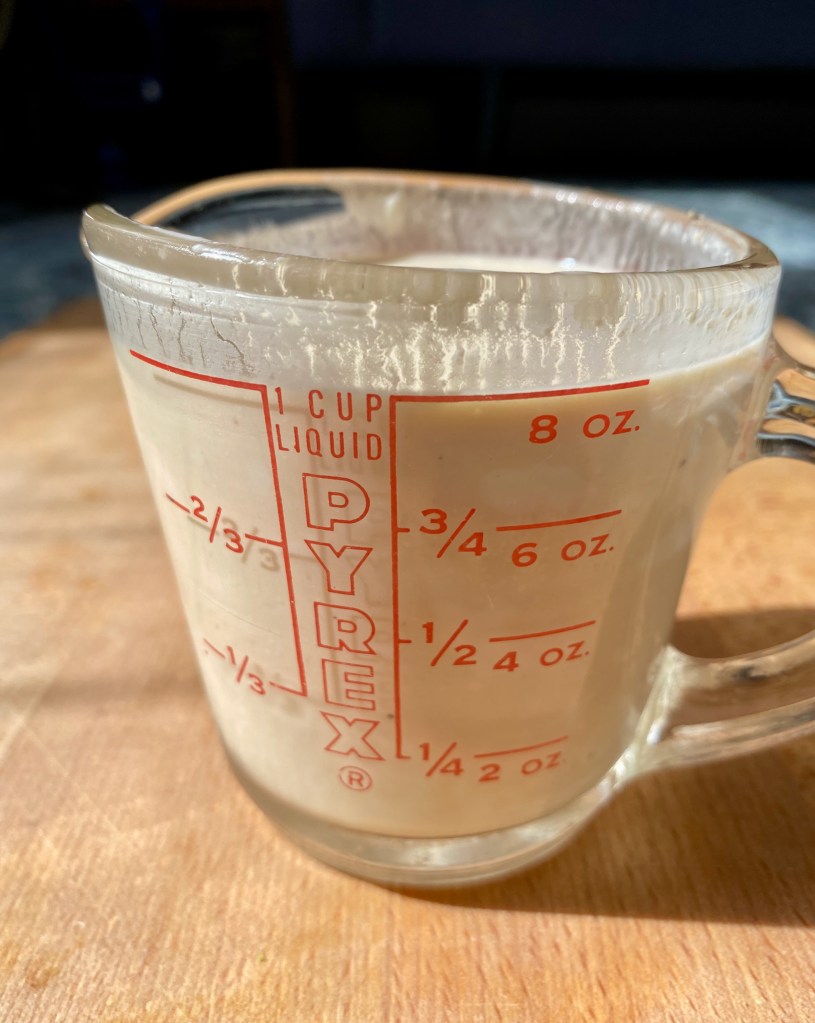
If you don’t have buttermilk, you can do what I do – measure 1 tablespoon of apple cider vinegar or lemon juice into a liquid measuring cup, add ½ cup of milk, cream or alternative milk, stir to combine, and let sit for 5 minutes. After five minutes, the mixture will thicken and curdle slightly. That means it worked! And we can use this in lieu of buttermilk.
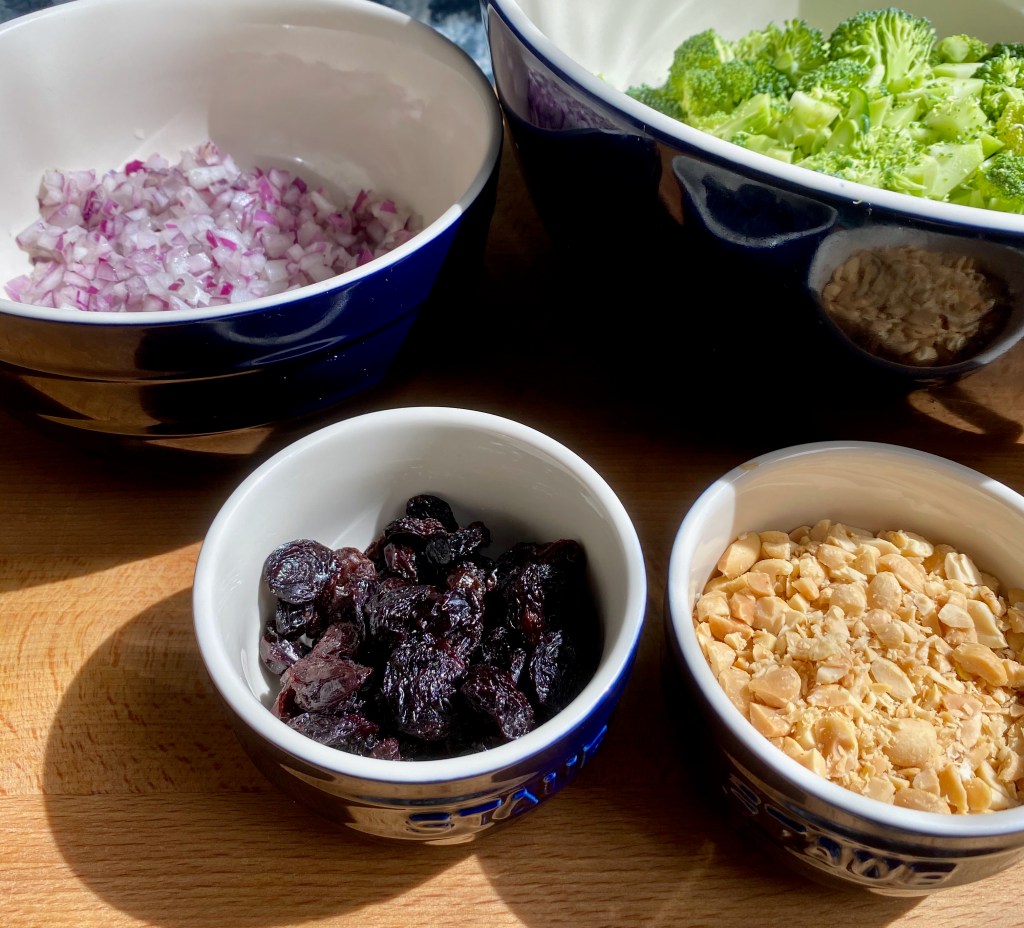
You can also swap out the peanuts for another nut like almonds or pecans, and the raisins for another dried fruit like cranberries.
This is the perfect side dish for a picnic or BBQ, and it only gets better after it sits.
Ingredients
2 heads of broccoli, chopped. Here’s my technique for chopping the broccoli:
Start by cutting at the base of the broccoli head, separating the stalk. Using a knife, remove the tough skin of the stalk. Cut lengthwise and lengthwise again. The slice horizontally so you are left with small pieces, about 1/2 inch or less. Then with the remaining broccoli heads, roughly chop so the pieces are the same size as the stalk pieces.
½ cup roasted and salted peanuts, chopped
⅓ cup dried raisins
½ small red onion, finely diced
½ cup buttermilk, or buttermilk substitute (see note above for how-to)
⅓ cup mayonnaise
3 tablespoons of apple cider vinegar (or 4 tablespoons if making buttermilk substitute)
1 tablespoon sugar
Salt and fresh ground pepper
Directions
Make the dressing: If making buttermilk substitute, start the process. Add 1 tablespoon vinegar or lemon juice to a liquid measuring cup, and add ½ milk, cream or alternative milk. Stir and let sit for 5 minutes.
If using regular buttermilk, add to a liquid measuring cup. Then add mayonnaise, apple cider vinegar, and sugar, and stir to combine. Add a pinch of salt and ground black pepper. Taste and adjust. Add the finely chopped red onion to the dressing, stir and let sit 5 minutes.
Add the chopped broccoli, peanuts and raisins to a large bowl and mix.
Pour the dressing with red onion on top. Mix well and taste – add salt if needed.
I’m getting sick of cooking every single meal – and I’m sure you are too! So, here is a dish that can be served multiple times (and it gets better as it sits, win win situation).
Stew may not seem summery, but San Francisco summers are a fickle beast. During the day it may be hot, but in the evening the wind starts up and the temperature drops. Like a lot. Enter warming, spicy, and comforting stew.
Have you cooked with harissa before? Harissa is a spicy and aromatic North African chile paste featured in a lot of Tunisian, Algerian, and Moroccan cooking. There are many versions of harissa, but it always includes hot chili peppers, garlic, and spices like cumin.
While harissa is traditionally a paste, I like using the coarse spice blend from Whole Spice, which can be made into a paste by adding olive oil. Your best bet for finding harissa is in Middle Eastern markets, specialty gourmet stores, and the ethnic section of most grocery stores. Or order some online from Whole Spice! Now that we are at home and cooking more than ever, it makes a big difference to have some fabulous spice blends to reach for.
Harissa pastes and powders have varying levels of spiciness, so taste your harissa before using and adjust accordingly. I use three tablespoons of the coarse spice blend, and I don’t find the stew to be very spicy. So you can add more or less harissa depending on your spicy-food tolerance.
Get creative with the type of squash you use! You may or may not need to peel the squash, it really depends on the type. I didn’t peel the acorn squash because it cooks for a long period of time, so its soft and easy to eat. Delicata squash also has edible skin. Examples of squash that needs to be peeled are butternut, kabocha, or pumpkin. A quick google search can always help if you’re not sure whether to peel the squash or not.
Ingredients
4 pounds lamb shoulder, cut into 2 inch cubes
2 tablespoons olive oil
2 red onions, halved and sliced
6 garlic cloves, smashed
3 tablespoons coarse harissa spice, or paste
Salt and pepper
4 cups stock – I use homemade chicken stock, but any type would work!
3 cups of water
1 small acorn squash, seeds removed and cut into 1 inch cubes
1 bunch of kale, de-stemmed, leaves chopped
yogurt, lime juice, or chopped preserved lemon for serving
Directions
Preheat the oven to 350 F. Heat Dutch oven on the stove over medium heat, and when the pan is hot add olive oil. In two batches, brown the lamb pieces, about 10 minutes per batch. When the lamb is brown, remove from Dutch oven onto a large plate.
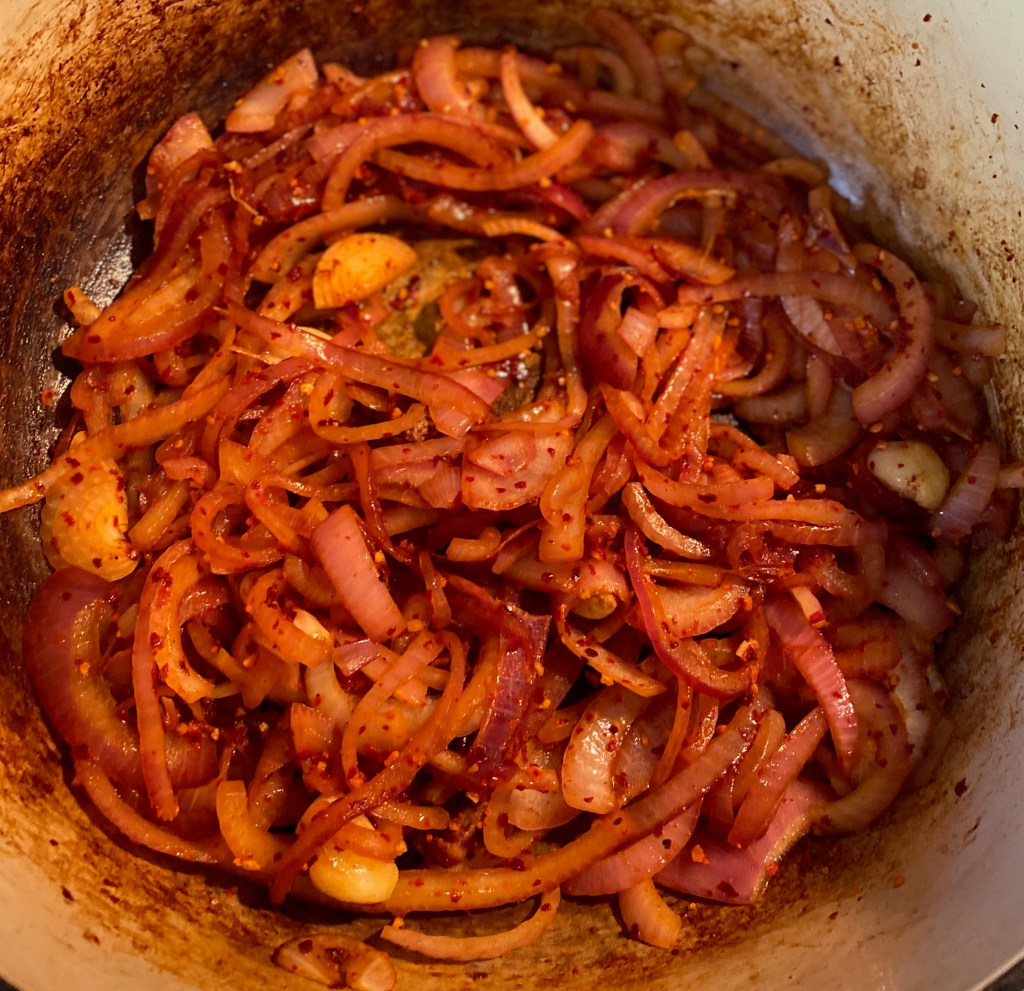
Add the red onion and garlic to the Dutch oven and saute for five minutes until vegetables start to get some color. Add harissa and saute for another two minutes. Add stock and water to the vegetables and bring to a simmer. Return the lamb to the pot, cover and bake for 1 hour.
After stew has been in the oven for 1 hour, take it out, and add the uncooked squash and stir. Put the lid back on the Dutch oven and put it back in the oven for 1 hour.
After the stew has been in the oven for a total of two hours, remove from the oven. Add the sliced kale leaves into the stew and stir to combine.
Put the stew back in the oven, uncovered, and cook for 20-30 minutes more. The sauce will reduce and the kale will be wilted.
You can either serve hot from the oven, or make it a day before you want to eat it. The flavors will get better as the stew sits, so this is a great meal to eat over a few days.
When ready to serve, top with chopped preserved lemon or lime juice, and a dollop of yogurt.
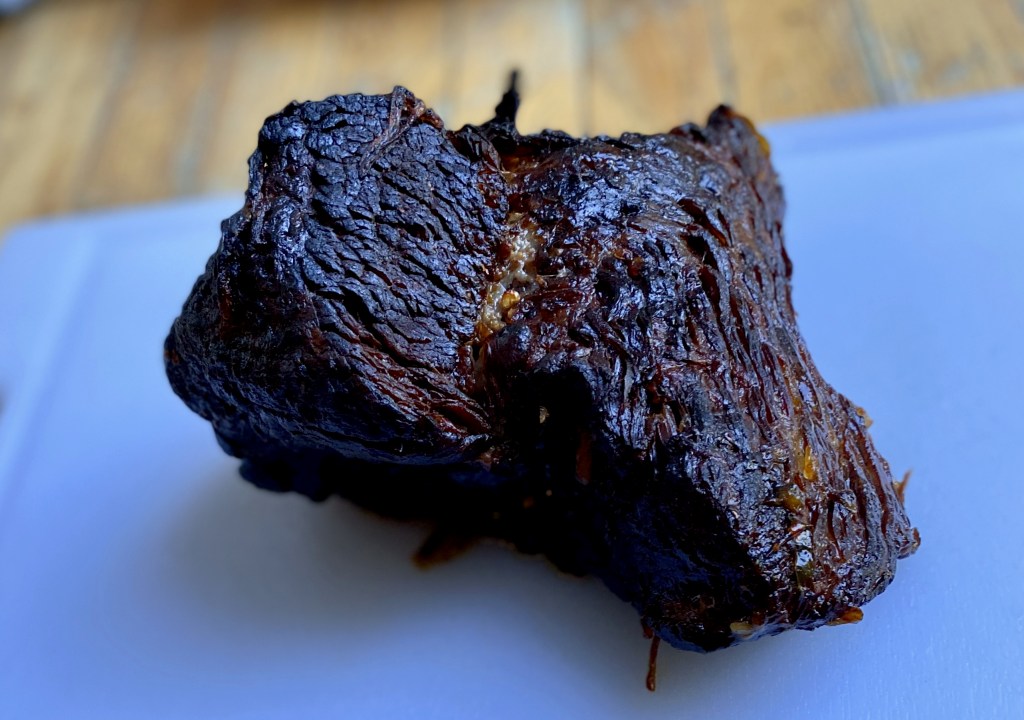
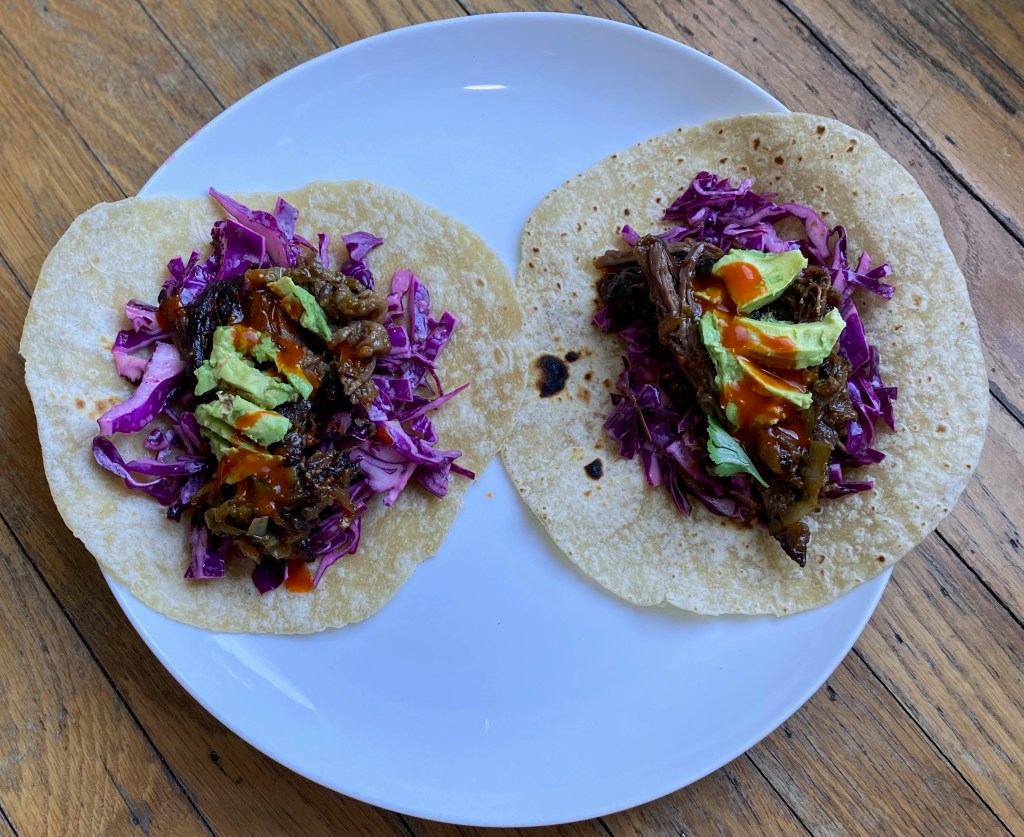
As a Jewish girl living in California (and heavily influenced by Mexican food) it seems only natural that I would eventually make brisket tacos! I used the framework for my favorite brisket recipe, but used lime juice and green chiles instead of fennel and vinegar. Kind of a riff on barbacoa? But not authentically mexican at all.
I used flour tortillas this time, but I love Siete Grain Free Tortillas, especially the cassava and coconut flavor.
I’ve been making brisket for many years, and while there are a lot of ingredients you can use (with equally delicious results), there are a few techniques that are a must.
pre-salt the meat
Whenever I get a large piece of meat to roast (this applies to beef, lamb, chicken and pork equally) I try to pre-salt the meat at least 2 hours in advance, or up to 1 day.
sear on all sides
You sear the meat on all sides to form a nice brown crust. This process also adds extra flavonoids from the crusty bits (yes, that’s a technical term) that stick to the pan and end up in the sauce.
aromatics
I always add onion and garlic to a brisket, sometimes fennel or carrots as well. For my “Mexican-inspired” dish, I wanted some heat and flavor from peppers, so I just added those in with the onions and garlic.
braising liquid
Brisket can be braised in a variety of liquids such as red wine, vinegar, stock or tomato sauce. You always want to add something acidic to help make the meat tender. For the tacos, I use a combination of chicken stock and lime juice.
low and slow
Either in the oven or the slow cooker – I have the best results when the brisket is cooked at a low temperature for multiple hours with the lid on (i.e. no liquid can escape).
turn up the heat
My favorite way to finish a brisket is to raise the oven temperature (425 F), take off the lid, and let cook until the sauce is reduced and the fatty top of the brisket is dark brown.
Ingredients for the brisket
3 pounds of brisket
1 large white onion, sliced thinly
3 green chiles – I used 2 anaheim and 1 jalapeno. This is not a very spicy recipe, so if you like more heat add another jalapenos or dried chile.
6 garlic cloves, smashed
3 cups stock of choice
⅛ teaspoon ground cloves
⅓ cup lime juice
1 Bay leaf
Salt and pepper
Tortillas of choice
Ingredients for the cabbage slaw
½ large or 1 small red cabbage
Zest from 1 lime
¼ cup lime juice
¼ cup avocado or olive oil
¼ cup mayonnaise
Salt and pepper
Salt and pepper
Directions
Pre-salt the brisket (¾ teaspoon of salt per pound) and let rest for a minimum of 2 hours or up to one day.
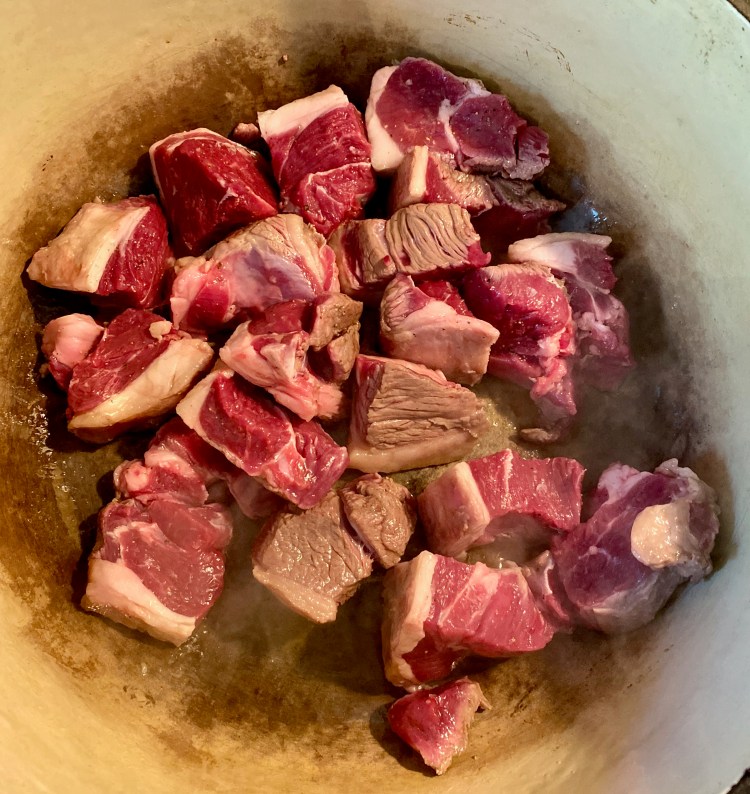
When you are ready to cook, preheat the oven to 300 degrees F. In a large Dutch oven, sear the brisket for between 5-10 minutes on both sides. I put the fatty side down first.
When the brisket is dark brown on all sides, remove from the Dutch oven onto a cutting board or large plate.
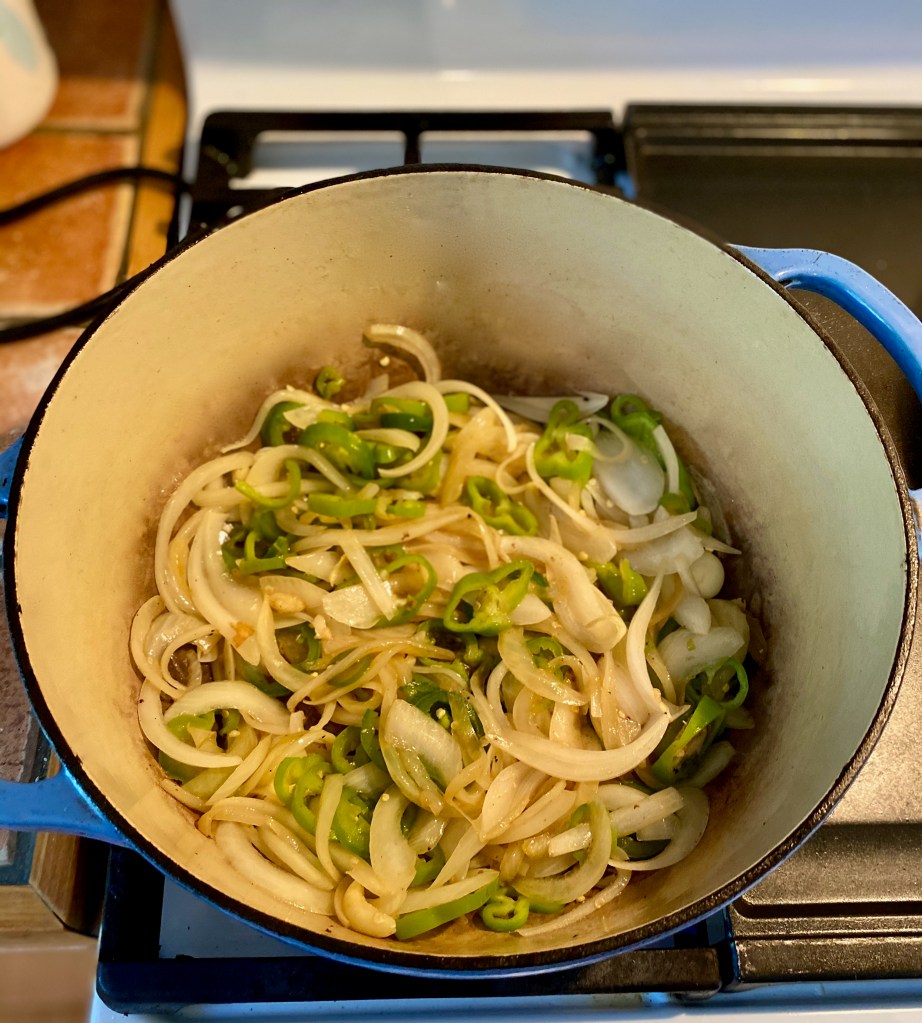
Add the chopped peppers, sliced onion, and smashed garlic to the dutch oven and saute for about 5 minutes to let the vegetables get some color. Add the spices and stir for one more minute.
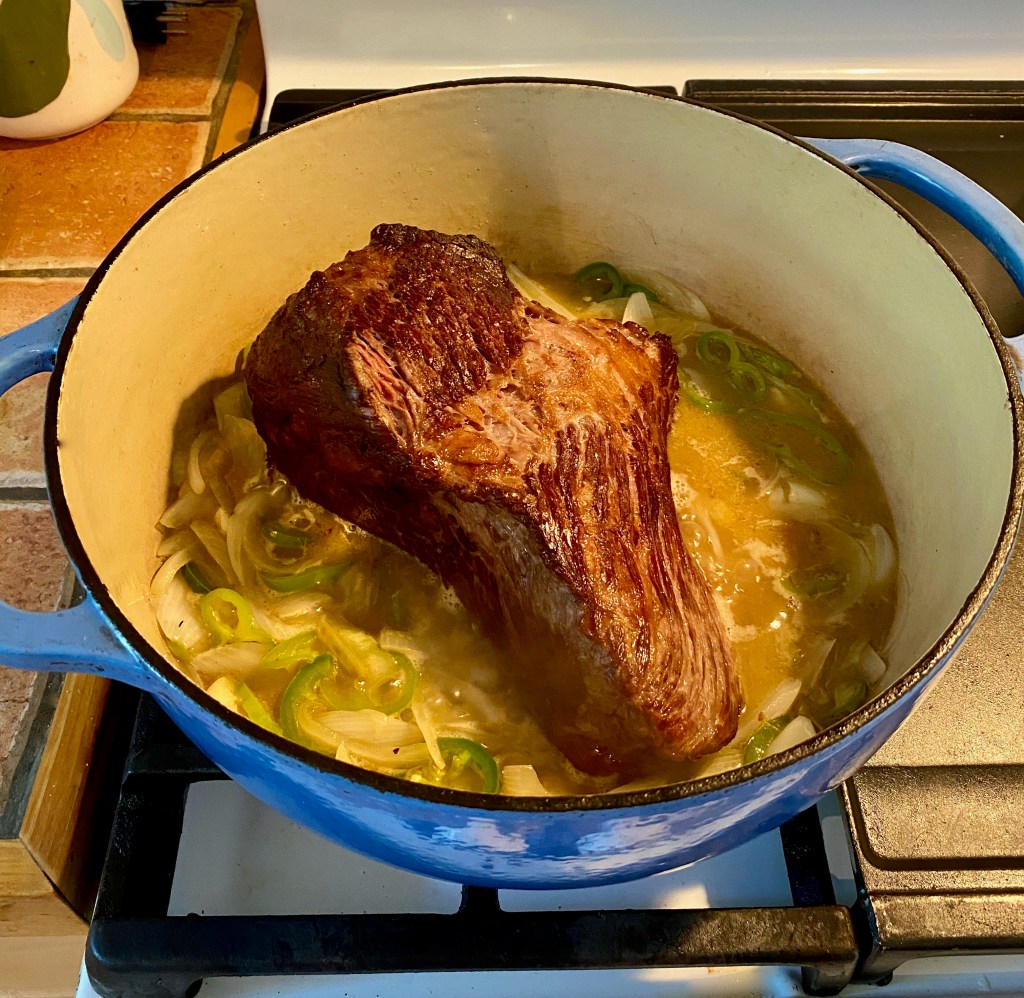
Add the stock and lime juice to the vegetables and stir. Carefully put the brisket back into the dutch oven, fatty side up.
Put the lid on the Dutch oven and put the brisket in the oven for three hours.
While the brisket is cooking, you can make the slaw!
Whisk together – lime juice, avocado or olive oil, mayonnaise, salt, and freshly ground pepper. Mix everything until the dressing emulsifies (i.e. comes together). Put the shredded cabbage and lime zest in a large bowl. Pour the dressing on top.
I like to use my hand to mix everything together, or you can use salad tongs. Set aside. *You can make the dressing up to 1 day in advance. It gets better as it sits.
After the brisket has been in the oven for three hours at 300 degrees F, take it out, and crank up the oven to 425 F.
Remove the lid from the Dutch oven and bake for another 40 minutes. The crust of the brisket should be deeply brown, and the vegetables start to carmelize. Remove the brisket from the Dutch oven and put on a large cutting board. Wait 5-10 minutes for the meat to cool.
Shred the meat using two forks – it should easily fall apart.
Add the shredded meat back into the pot and stir together with the sauce.
If you’re feeling fancy, plate the brisket on a large platter before serving.
When you are ready to eat, start with your tortilla of choice, add some brisket, and top with cabbage slaw. Feel free to add any other toppings like avocado or hot sauce and enjoy!
J’adore galettes and I make a lot of them! Apple galettes for Thanksgiving, cherry galettes for my Dad’s birthday (his favorite), and galettes with whatever looks good at the farmers’ market.
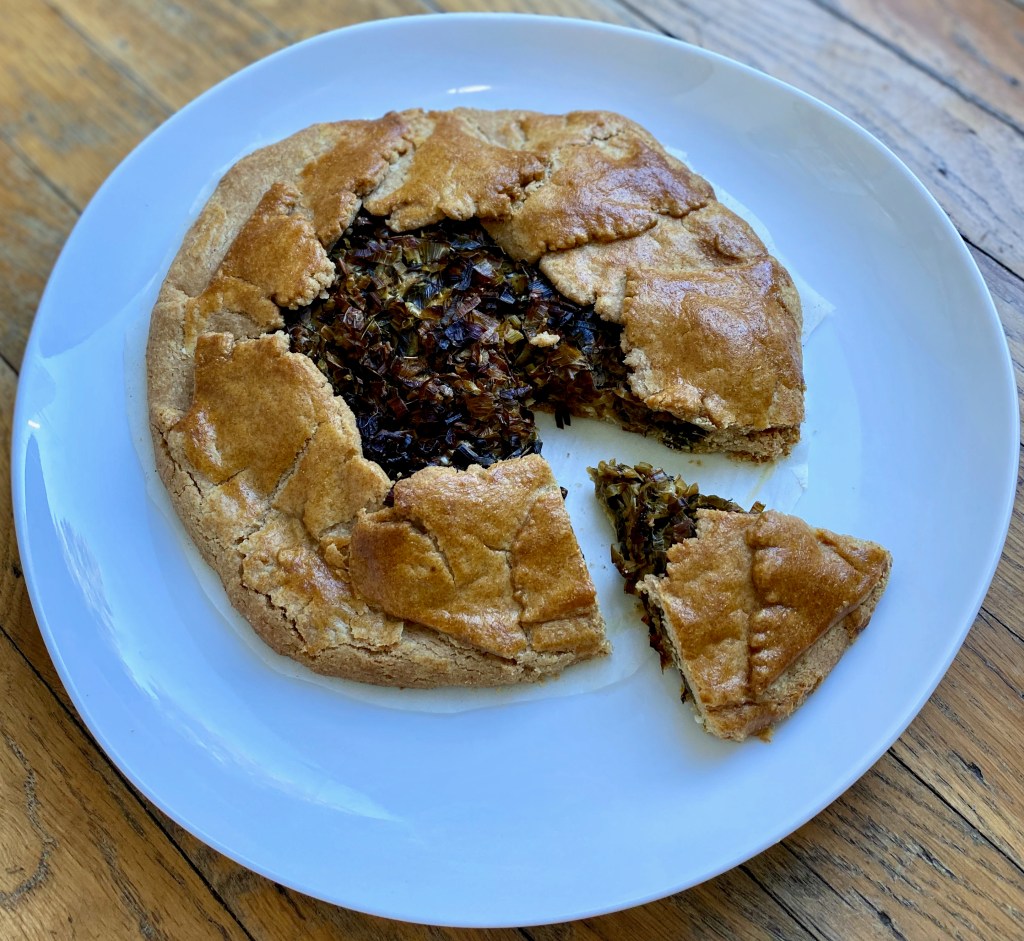
It’s only recently that I started to make savory galettes, because I ordered too many vegetables in our weekly Imperfect Produce box. Whoops! I was bored with other recipes and had extra pie dough in my fridge. Enter the savory galette. Add a bright salad and (and maybe a glass of pet-nat?) for a perfectly acceptable lunch or dinner that everyone will love because, well, it’s pie for dinner!
I thought leeks and goat cheese – a classic combination – could not lead me astry. Leeks are the onion’s slightly sweeter and milder cousin, and taste amazing when paired with tangy goat cheese, fresh lemon, and earthy thyme.
The pastry recipe has been my mainstay for many years. It’s a shortcrust pastry and works well for pies, quiches, and galettes.
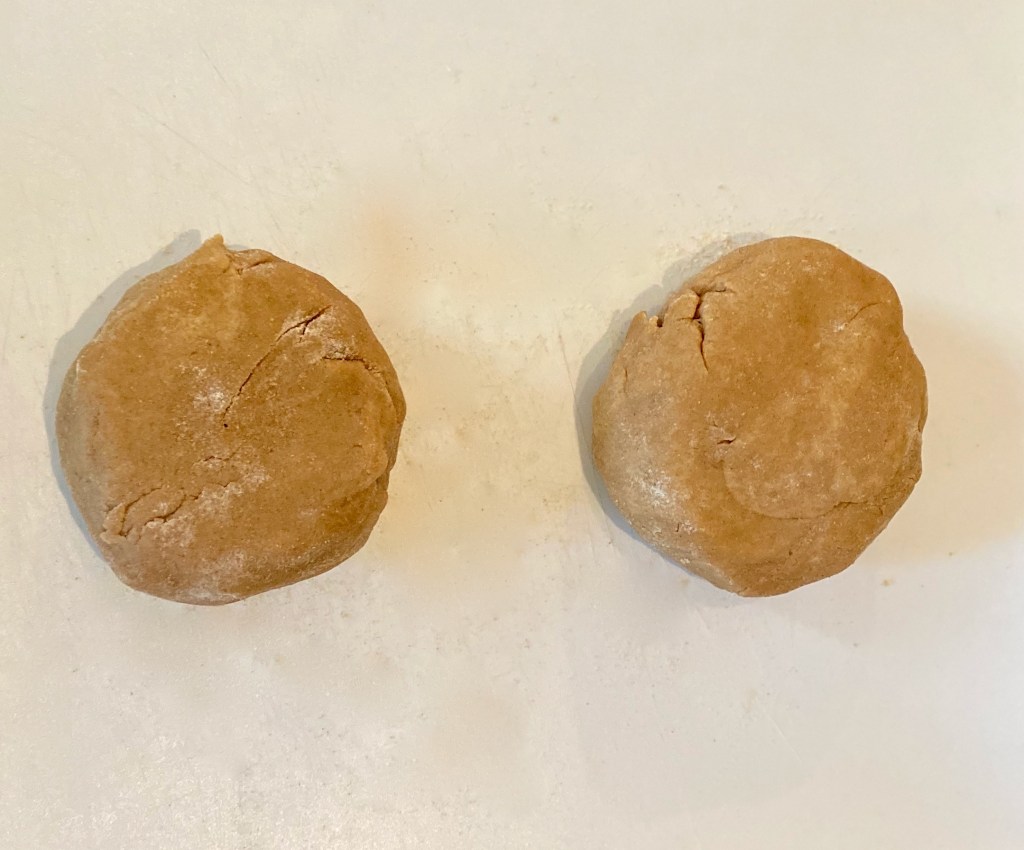
The ingredients listed here to make enough pastry for two galettes, because if I am going to the trouble of making pastry, I may as well have some left over for another cooking project!
Cut the recipe into half (1 stick of butter, 1 cup of flour, 1 tablespoon of cold water) if you don’t want and extra pastry for a rainy day.
You will need a food processor for this recipe.
Ingredients
Easiest pastry
2 sticks of salted* butter, 1 cup total
2 cups of whole wheat flour
2 tablespoons ice cold water, plus more if needed
*I use salted butter in basically all my cooking (yes even baking!), so if using unsalted butter, add a pinch of salt
Leek and goat cheese filling
2 large leeks
3 ounces of goat cheese
1 small lemon, zested
1 tablespoon of thyme
2 tablespoons of butter
Pinch of salt, freshly ground black pepper
1 egg
Directions
Let’s make some pastry! Take out your food processor. Cut the two sticks of butter into cubes and add to the food processor. Then add the flour.
Pulse, until the butter is roughly the size of peas. Add 2 tablespoons of cold water and pulse a few times, it quickly comes into a dough. Don’t overmix here! If you do overmix, the pastry will be tough.
Take the dough out of the food processor onto a lightly floured surface. Using your hands, roll the dough together into a large ball or oval. Divide the dough into two portions by using a pastry scraper or knife. I use my kitchen weight to make sure they are the same size, but this isn’t necessary! Wrap up one of the dough balls in saran wrap and throw into the fridge or freezer for another time.
Line a cookie sheet with parchment paper, and lightly coat in flour. Place the dough ball in the middle of the pan, and add a little bit of flour on top of the dough. First, using your hand, flatten the dough ball. Then using a rolling pin, gently roll out the dough, into a large circle (or rectangle!) that reaches the edge of the cookie sheet.
I aim for the dough to be ⅛ inch thick. If the dough gets too warm (you know this is happening if it’s getting sticky while you are shaping it) put the cookie sheet in the fridge to allow the dough to firm up again.
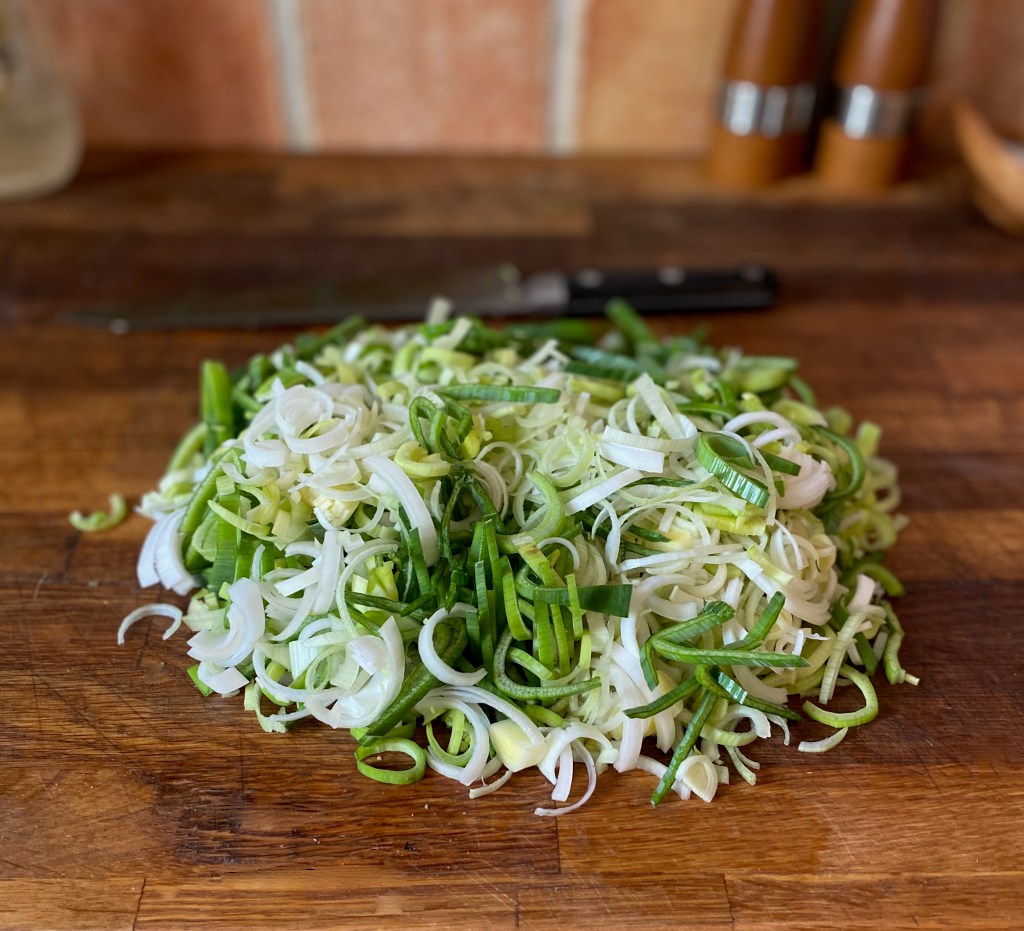
Let’s make the filling!Leeks are super dirty, so make sure you clean them properly because an dirt in the dish will be gross. Cut the leeks in half widthwise, and then in half again lengthwise. Fill a large bowl with cold water and add the leek pieces. Swish the leeks around in the water, and separate the layers to ensure you have removed all the dirt. Once the leeks are clean, remove from the water bowl and lay out on a dish towel to dry.
Thinly slice the cleaned and dried leeks.
In a large saute pan, turn the heat to medium-high. When the pan is warm, add 2 tablespoons of butter. The butter should melt quickly – then add the leeks and lower the heat to medium.
Cook the leeks 20-25 minutes, stirring frequently, until they caramelize. You will need to keep and eye on these! If they start to brown too quickly, turn the heat down. When the leeks are 1-2 minutes away from being done (golden brown!) add: pinch of salt, a couple grinds of black pepper, 1 teaspoon of thyme, and the zest from 1 lemon. Cook for another 1-2 minutes to allow the flavors to combine, and remove from the heat.
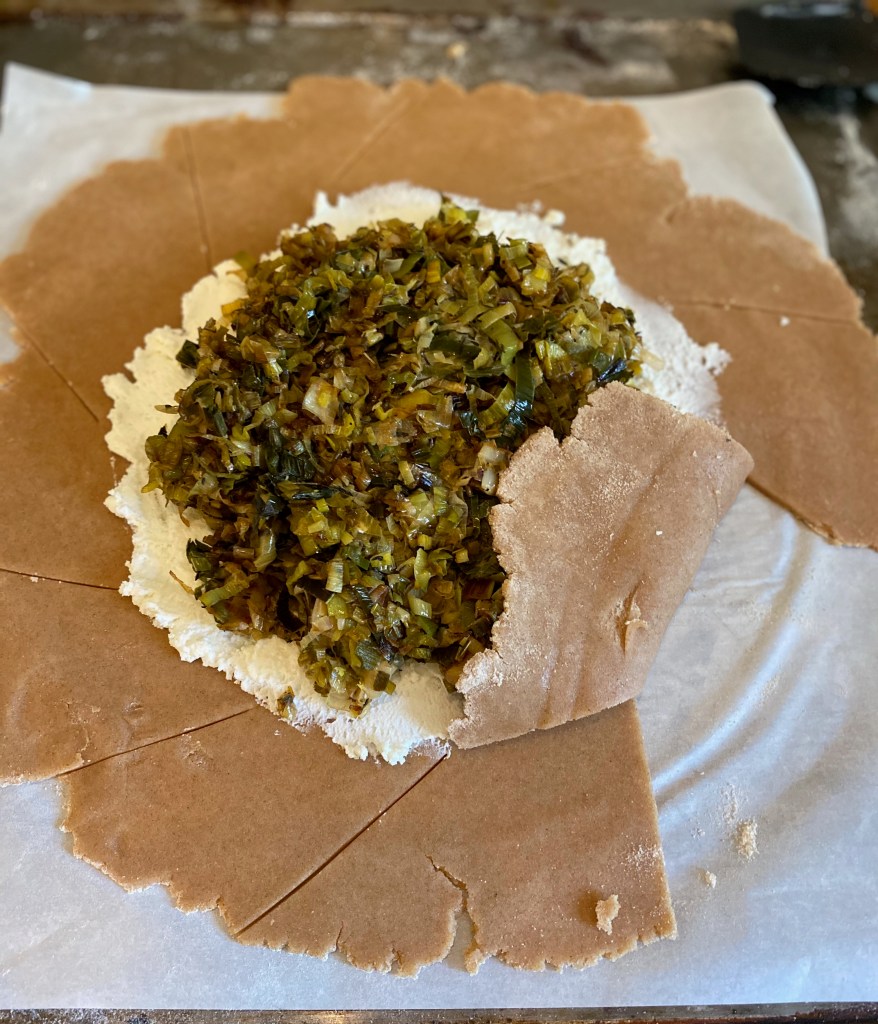
Assemble! Preheat the oven to 400 degree F. Take out the pastry dough (if in the fridge). Spread the goat cheese out in the middle of the galette, leaving about a 4-inch margin between where the goat cheese ends and the pastry ends.
Add the caramelized leeks on top of the goat cheese.
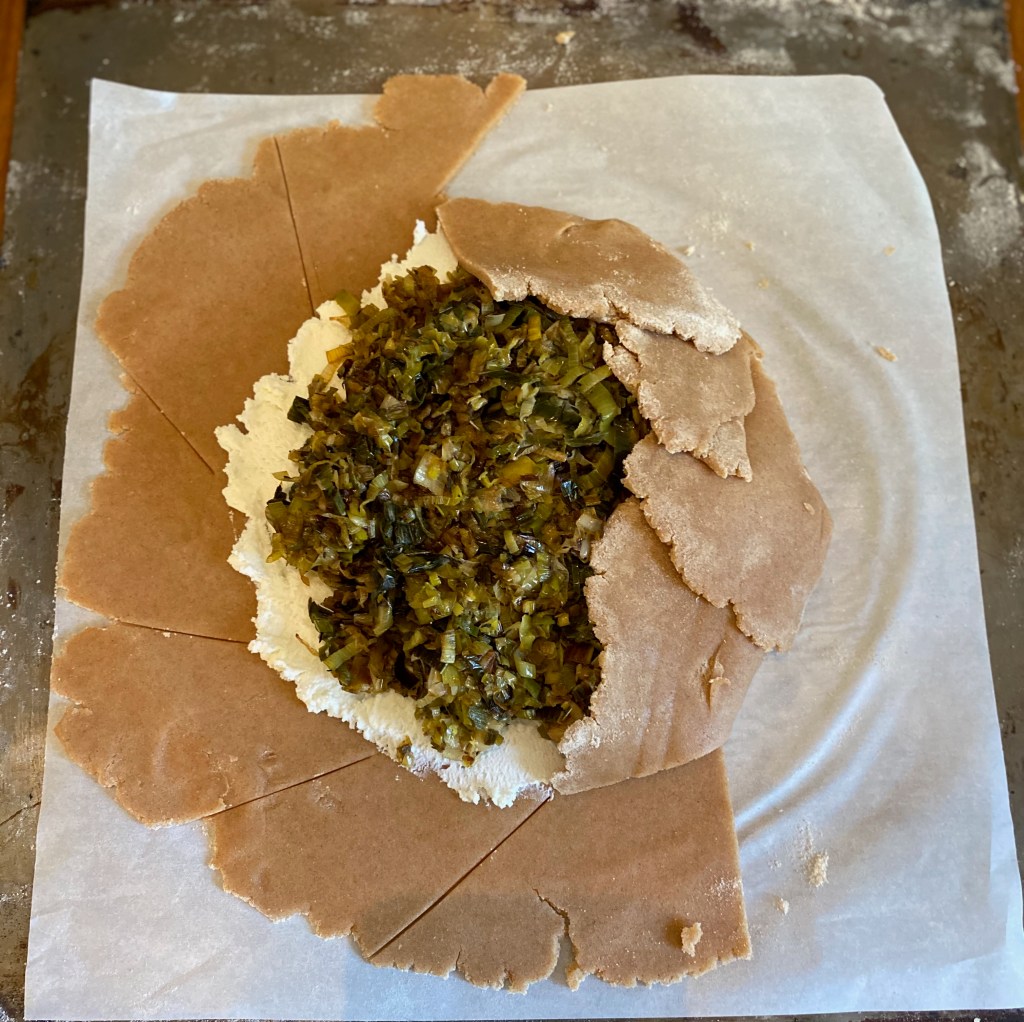
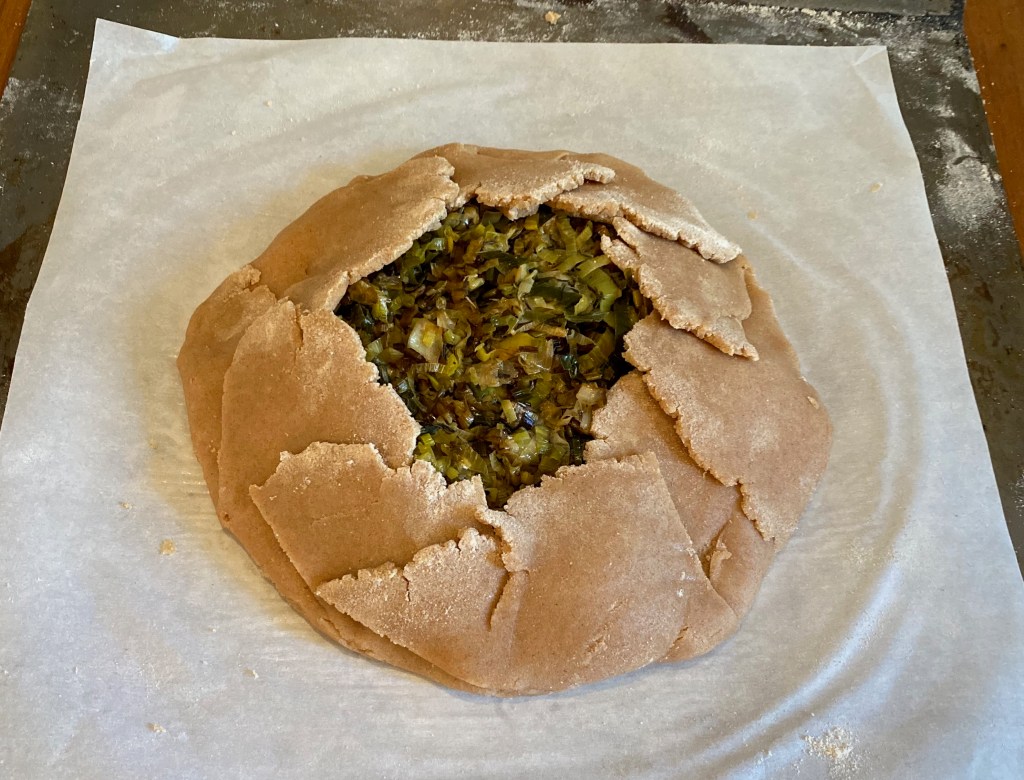
Cut from the edge of the dough to the start of the leek and goat cheese filling, making slits in the border of the galette in 2-inch intervals. Fold the flaps up and over the filling, overlapping as you go around the circle.
Crack the egg, whip it, and using a pastry brush, coat the galette with an egg wash before popping into the oven. Galette will bake for 40 minutes, until the crust is a dark brown. Take out and let cool before serving.
I did not like vegetables as a kid. The dreaded vegetable had to be eaten before I could move on to the good stuff, like dessert. To try and outmaneuver this rule (not sure how I thought my 5-year-old brain could trick my parents), I decided that, just like cows, I had multiple stomachs: one stomach for regular food and one stomach for dessert! My regular food stomach would be full, so no I can’t finish those veggies… but I still have room in my dessert stomach for some of those peanut butter chocolate squares you made. My parents did not fall for this, so I was stuck having to finish my plate. I give myself points for creativity, if not for execution.
Growing up, everything was steamed or boiled. Yes, these are very healthy ways to cook vegetables, but are they delicious? Not so much. As an adult, my relationship with vegetables has changed a lot. Most days, at least one meal is a salad, and at least two of my meals have a vegetable component. Now I love vegetables because there are much better ways to get flavor from a vegetable than steaming or boiling.
I roast almost every vegetable that comes into my kitchen. You would be alarmed at the amount of olive oil we go through (hey, it’s healthy right?). I challenge you to find me a vegetable that doesn’t taste better roasted versus steamed. Roasting vegetables creates a perfectly brown and caramelized exterior, which amplifies the vegetables’ natural flavors.
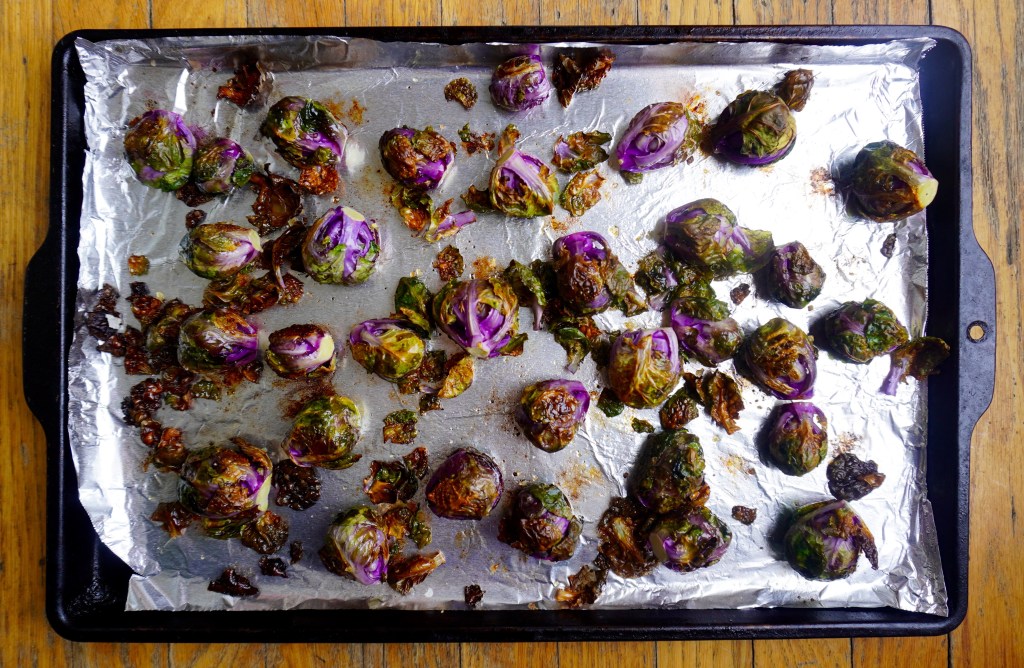
This recipe for roasted Brussels sprouts is based on a Bon Appetit recipe with a few changes based on my preferences. The honey plays off the caramelization of the sprouts, but it doesn’t veer into cloying territory because of the lime and chile flakes. I made this recipe for Thanksgiving last year, and I had to go out and buy more Brussel sprouts because my kitchen “helpers” ate up the first batch before they made it on the plate for dinner.
Ingredients
1 pound Brussels sprouts, trimmed
2 tablespoons virgin olive oil
1 lime, first zested and then juiced
2 tablespoons sunflower seeds
½ tablespoons of honey
Scant ½ teaspoon red chile flakes
1 teaspoon of butter
Salt and pepper
Directions
Preheat the oven to 450 degrees F. Line a rimmed baking sheet with aluminum foil. Toss the Brussels sprouts in a large bowl with olive oil, salt, and pepper and spread on a baking sheet.
Roast for 15 minutes; after 15 minutes pull them out to shake and then put them back in the oven for another 5-10 minutes. They are done if you can slip the tip of a small knife easily through. The Brussels sprouts will be deeply brown, almost burnt.
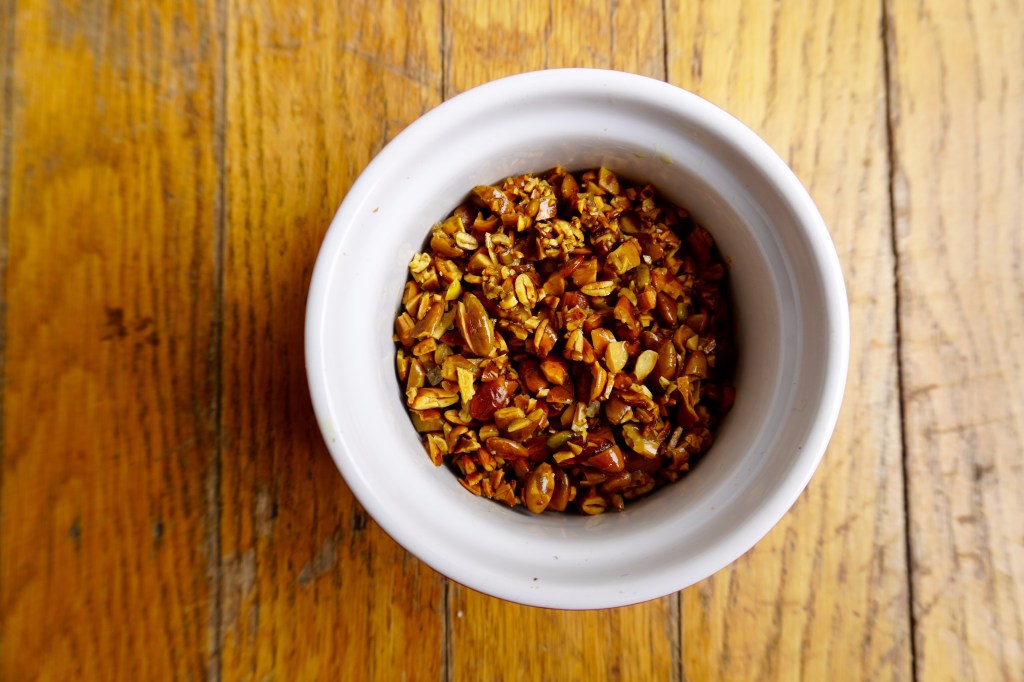
Melt the butter in a skillet, and when melted completely add the pumpkin seeds and a pinch of salt.
Cook (stirring frequently) until the sunflower seeds are golden brown (about 4 minutes) and remove the seeds from the pan using a slotted spoon. Coarsely chop the seeds, put them in a small bowl, and set aside.
In the same skillet used for the seeds, add the honey and lime juice and stir to emulsify (this will happen quickly). Then add the Brussels to the pan and coat with the sauce.
Once Brussels sprouts are coated with the sauce, place on a serving platter.
In the small bowl with the pumpkin seeds, add the lime zest and chile flakes. Stir to combine.
Sprinkle on top of the Brussels sprouts and serve.
When my mom was little, she would wait until her mom wasn’t looking and steal the crispy bits (the best part) of the latkes from the cookie sheet when they were resting. This is an inherited habit. I would also steal the crispy bits of the latkes, until mom noticed and shooed me out of the kitchen. The best part about making latkes as an adult is that no one is watching when you steal the best bits. The second best part about making latkes as an adult is you can make them however the heck you want! And I want my latkes spicy.
Latkes are usually served with sour cream and applesauce. I’ve always been Team Sour Cream, but wanted to zhush it up. Adding spring onion and dill gave me scallion cream cheese vibes (is that anyone else’s favorite on a bagel?) You can also use green onion instead of spring onion with equally delicious results.
Any form of fried potato is going to be good, but there are a few variables that go into making a latke great:
Select the right potato
I usually wax poetic about sweet potatoes, but the orange flesh variety does not work well for latkes. However, I do like to use Japanese sweet potatoes (also called Murasaki), which have white flesh and purple skin and are available at Trader Joe’s. These sweet potatoes are drier and creamier than their orange-flesh counterpart, and when fried, they brown like a standard Russet potato. In a latke recipe, the orange sweet potatoes stay soft and never get that crispy element you are looking for.
Drain the excess
I don’t remember learning to drain the liquid from the grated potatoes and onions from my family, but I have to give credit to Smitten Kitchen for illuminating me about the benefits. My latke game has gotten considerably better (crispier!) since I started doing this.
Fluff it up
Baking powder helps make the latkes more fluffy, but is optional. I also use flour instead of matzo meal. Last year for Hanukkah, I made one batch of latke with matzo meal and a second batch (because we worried about having enough food – classic!) using flour. The batch with flour held together better, and looked visually more appealing (also very important). Flour is also more likely in your cabinet than matzo meal (unless you’re like our family and always have a box of matzo 1-2 years old in your cupboard).
Some like it hot
Adding chiles to latkes is may have traditionalistsshaking their head, but if you like spicy food, I highly recommend you try it! Or go traditional and skip the chiles.
Fashionably dangerous
Wear an apron or shirt you don’t care about. I have ruined more shirts than I would like to admit frying latkes.
Ingredients
For the spicy latkes
2 small or 1 large potato (8 oz.) I like to use Japanese sweet potatoes, but russets are more traditional
½ medium yellow onion (5 oz.)
1 large egg
1 tablespoon of flour
½ teaspoon baking powder (optional)
2 serrano chiles, finely diced (optional)
½ cup vegetable oil (canola, sunflower, etc.)
Salt and pepper
For the spring onion sour cream
8 oz. sour cream
1 large spring onion, thinly sliced
1 tablespoon avocado oil
¼ cup chopped dill
Salt and pepper
Directions
Make the spring onion sour cream. Mix together sour cream, spring onions, dill, and avocado oil in a small bowl. Add salt and pepper to taste.
Now let’s make some latkes.Set the oven to 200 degrees. Take out two cookie sheets, and line one with paper towels. Keep those paper towels close by, you are going to need more to help drain excess oil from the latkes.
Scrub the potatoes, but leave the skins on. Grate the potatoes and onion together into a large bowl. You can use a food processor if you have the grating attachment, otherwise just use a box grater and some elbow grease.
Transfer the grated potatoes and onion into a large cheesecloth or dish towel (that you don’t care about too much). Gather the corners of the cloth and twist the bundle of potato and onion over a large bowl. Squeeze the bundle until you get out as much liquid as possible.
Once you have squeezed until you can’t squeeze no more, discard the liquid and put the dried potato and onion shreds into a bowl. Add the egg, flour, baking powder, chiles, salt, and pepper. Mix all of the latke ingredients together, making sure everything is evenly distributed. Set aside to rest, 5-10 minutes.
Add about ½ of the oil in a large cast iron skillet over medium heat. Wait until the oil is hot – to test, drop a small amount of batter into the pan – if it starts to sizzle immediately, then you are ready to fry.
Carefully, slide a large tablespoon of the mixture into the pan and flatten with the spoon. A cookie scoop also comes in handy for ladling out latkes (mine is 1 ½ tablespoons), with the added benefit of uniformity. But a tablespoon works just fine.
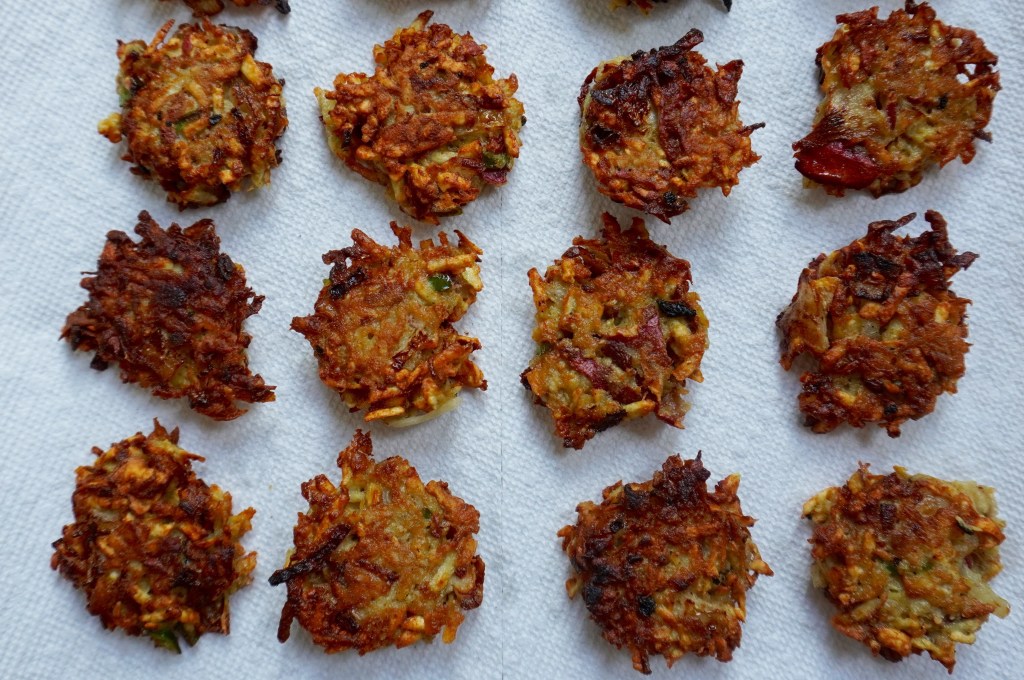
Continue to add latkes to the pan, but don’t crowd them. I usually fit 4 in a 10 inch skillet. Cook until the first side is deeply brown – this can be anywhere from 2-5 minutes depending on how hot your pan is. Then carefully flip to cook the other side.
Once the latke is brown on both sides, transfer to the cookie sheet that is lined with paper towels. Continue to make latkes in the pan, adjusting the heat if they brown too quickly or not enough, and adding them to the paper towel lined cookie sheet.
Once you have a layer of latkes on the paper towels, transfer those latkes to the second cookie sheet and put into the oven to keep warm. Replace the oily paper towels with a fresh set, and continue to make latkes – letting them drain on the paper towel-lined cookie sheet and then transfer to the oven to keep warm.
After you have finished making all of the latkes, serve immediately with spring onion sour cream. Latkes are best eaten right away. Leftovers can be kept in the fridge and made into breakfast the next day (but that’s a post for another day…)
Nopi is Ottolenghi’s Soho (London)-based restaurant that I aspire to go to (once we can travel again, of course). Until then, I have to satisfy my wanderlust by cooking from the Nopi cookbook here in Noe Valley! The book itself is gorgeous, with vibrant pictures and gold-foil lined pages. It is pretty enough to be a coffee table book, but of course, all my cookbooks are in my kitchen within easy reach (and smeared with food from past cooking ventures).
I’ve expressed my love for Ottolenghi cookbooks in general, but I haven’t cooked very much from the Nopi cookbook because the recipes are a way more complex. They are recipes created for a restaurant, not a home cook. Generally, I prefer less effort for big outcomes but with all this time on my hands at home, what better time than now to tackle a complicated and slightly fussy recipe?
The Spicy Latke likes to add a little drama to a recipe, but here I wanted to pull back because the recipe is already plenty dramatic. So, the challenge boiled down to: How can I retain all the amazing contrasting textures and flavors, but skip another trip to the grocery store?
My version keeps most of the steps, but pares down the recipe to items that you might have on hand*. I cut the recipe in half, and stuck to one method of preparation for the cauliflower. The steps I decide to keep are worth it – salty and creamy cheese spread, tangy and plump raisins, crunchy sunflower seeds, crispy fried capers, and a simple mustard dressing to bring it all together.
This is a dish that makes a regular Tuesday night feel a little more special, without too much effort.
*If you don’t have the exact same ingredients, here are some alternatives:
Instead of goat cheese, use ricotta, yogurt, or sour cream
Instead of raisins, use dried currents or cherries
Instead of red wine vinegar, use white wine, champagne or apple cider vinegar
Instead of sunflower seeds, use pine nuts or almonds
Serves 2-3 as a side.
Ingredients
1 medium cauliflower, trimmed and broken up into florets
1 oz capers, rinsed, dried and divided into ½ oz portions
3 oz goat cheese
1 oz raisins
Scant 1 oz sunflower seeds
4 tablespoons olive oil
3 tablespoons red wine vinegar
¼ cup vegetable oil (for frying capers)
Salt and pepper
Directions
Preheat the oven to 425 degrees F. Toss cauliflower florets with 2 tablespoons of olive oil, salt and pepper. Roast cauliflower for 30 minutes, tossing at the half-way point. The cauliflower should be toasty and brown, so leave in the oven for longer if needed.
In a small pan, add 2 tablespoons of red wine vinegar, ¼ cup of water and the raisins. Boil the liquid and then set it to simmer for 5-6 minutes, until the raisins have swelled and the liquid has evaporated. Set aside.
Finely chop ½ oz of capers, and add to goat cheese with 1 tablespoon of olive oil and salt and pepper. Mix to combine.
Wipe out the small pan used for the raisins, and add ¼ cup of vegetable oil. Wait until the oil is hot and shimmering, and add the remaining ½ oz of capers. The capers take only about a minute to fry, take them out using a slotted spoon once they start to flower open.
In a small bowl, add mustard, 1 tablespoon of red wine vinegar, 1 tablespoon of olive oil, salt and pepper (to taste) and whisk until emulsified.
goat cheese & caper spread, vinegary-raisins, and mustard dressing
To serve: On a large dinner plate or small serving platter, evenly spread the goat cheese and caper mixture.
Our plates are from West Elm
Add the roasted cauliflower on top of the cheese.
Sprinkle the raisins, capers, and sunflower seeds on top of the cauliflower. Then pour the mustard dressing on top of everything and serve.
Pair with garlic sausages, roast chicken or a green salad.
The past few months have been tough to say the least, and I have been baking a lot more than usual. When the February 2020 issue of Bon Appetit arrived, I was thrilled to see there was a section all about “How to Be a Better Baker”. Good news for my habit of stress-baking. Bad news for my skinny jeans.
The Cinnamon-Date Sticky Buns and the Triple-Threat Onion Galette look incredible but those will have to wait until I have all the necessary ingredients. But you know what I do have the ingredients for? Salty Buckwheat Chocolate Chip Cookies!
It goes without saying that this is not an original recipe. Not even a little. I give full credit to Sarah Jampel and Bon Appetit magazine for this delicious confection. You already know much I enjoy buckwheat flour, but I had never tried a buckwheat flour cookie before. Are these good? Let’s just say I have made them twice in two weeks.
I made a couple substitutes, mostly because some ingredients are hard to find during the shelter-in-place. The original recipe calls for three egg yolks, instead I used two whole eggs and saved the third for tomorrow’s omelette. Instead of all-purpose flour, I used my trusty Bob’s Red Mill rice flour to make these cookies gluten-free. I got fancy and finished the cookies with Maldon sea salt, instead of Diamond Crystal. But adding salt to dessert is very on brand for The Salty Latke … may I refer you to food commandment number four, “All desserts can benefit from a pinch of salt”.
Ingredients
½ cup (1 stick) unsalted butter
1 cup rice flour (or all-purpose flour)
½ cup buckwheat flour
½ tsp. baking powder
½ tsp. baking soda
¾ tsp. Diamond Crystal salt, plus more/ or Maldon sea salt
6 oz. bittersweet chocolate bar or chips (Bon Appetit recommends a bar or wafers, but I used chips because that is what I had!)
⅔ cup light brown sugar
½ cup granulated sugar
¾ teaspoon kosher salt
2 large eggs
1 teaspoon vanilla extract
Directions
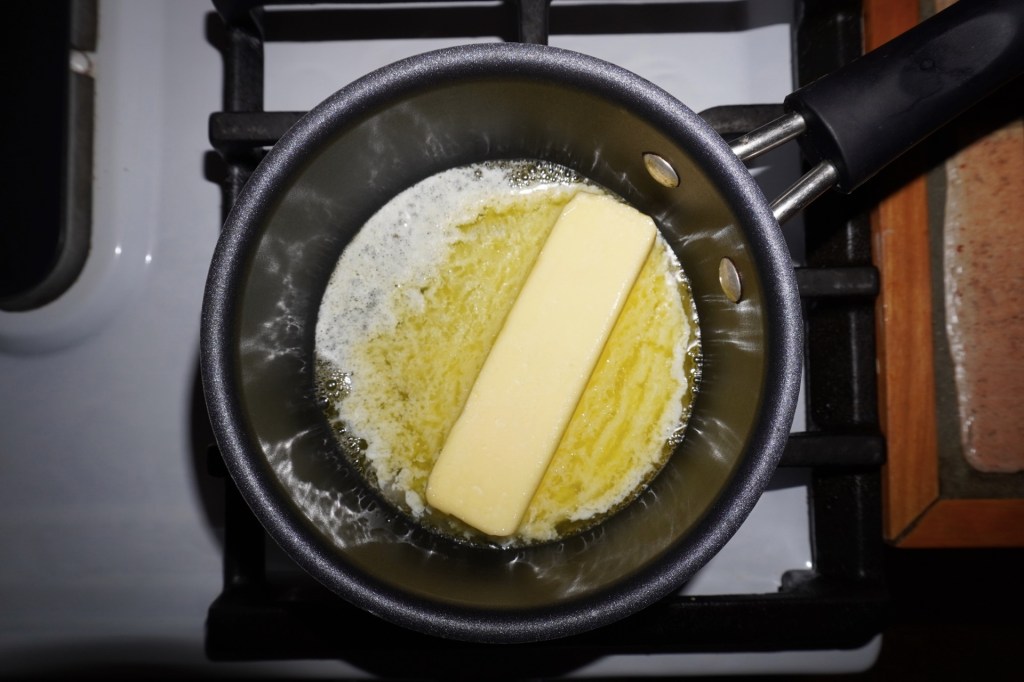
Melt butter in a small saucepan over low heat – you don’t want any browning here so keep the heat down low and the butter should be melted under 5 minutes.
Whisk flours, baking powder, baking soda, and salt in a medium bowl.
If using a chocolate bar, coarsely chop. If using chocolate chips, no need to chop. Either way, set aside a small amount of the chocolate in a small bowl – this will be added on top of the cookies.
Pour melted butter into a large bowl, add both sugars, and whisk for 30 seconds until all the big lumps are gone.
Add the eggs, one at a time, and keep whisking until fully combined. Add the vanilla extract and continue whisking until the mixture is smooth and creamy.
Add the dry ingredients to the wet ingredients and stir until incorporated. Mix in the chocolate chips or chopped pieces and stir to distribute into the batter.
Cover the bowl with a dish towel and put in the fridge for a minimum of two hours.
Ready to Bake? Place racks in the upper and lower thirds of the oven and preheat to 375 degrees. Line two cookie sheets with parchment paper. Using a tablespoon or cookie scoop, scoop out 1-2 tablespoon portions of the dough. Put 9 portions on each cookie sheet – cover and chill the remaining dough to be baked later. Roll portions into balls and press a couple pieces of reserved chocolate on top of each cookie.
Bake the cookies for 8-10 minutes. Rotate the baking pans halfway through, top to bottom and front to back. You are looking for golden edges people!
Pull the baking sheets out of the oven and lightly tap the pan on the stove. Sprinkle each cookie with Maldon sea salt. Let cool on the baking sheet for 5-10 minutes. If you have a cookie rack (I don’t), transfer to the rack to cool completely. Or do what I do, and gently move the parchment paper with the cookies off the baking sheet and onto the counter to cool. Repeat the baking process with the remaining cookies.
Alternatively, you can bake half of the cookies and keep the uncooked dough in the fridge or freezer. When ready to bake, follow the same directions.