brussels sprouts risotto

i risotto puns easily!

Plenty More is one of the seven (yes, seven!) beloved Ottolenghi cookbooks that grace my kitchen. This one is vegetable-centric with a lot of fantastic recipes. I was reading it recently for inspiration and realized I had everything to make this dish, in particular, some homemade stock languishing in my fridge. I supposed I could have stuck it in the freezer, but this recipe popped up from the recesses of my mind. 

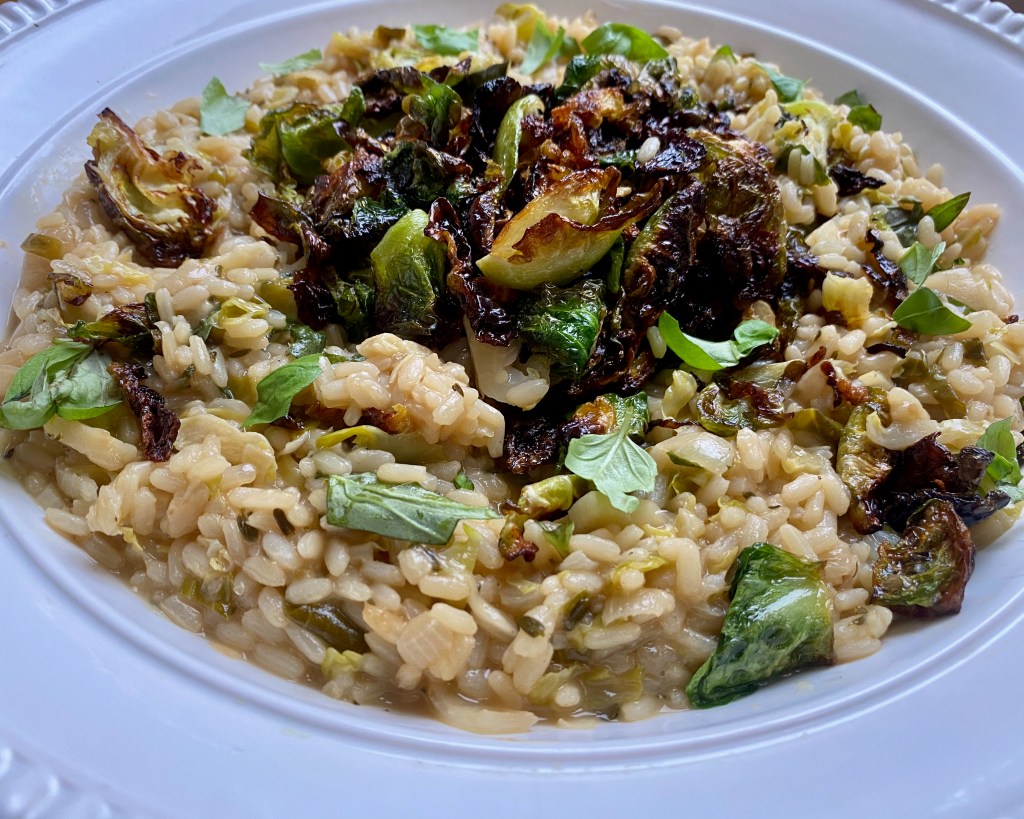
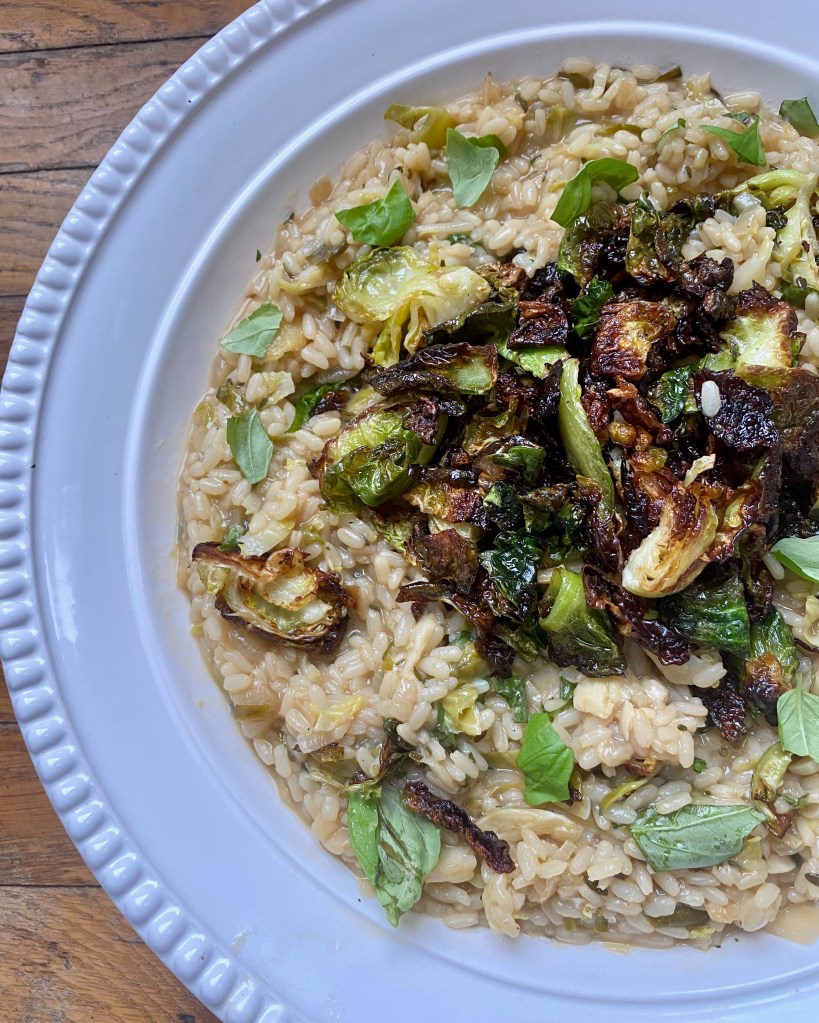
This dish is warm, cozy, and indulgent, but also sneaks in a pound of vegetables. The lemon zest cooked with the rice, and also added at the end, adds a brightness that is needed to cut through the rice and cheese. 

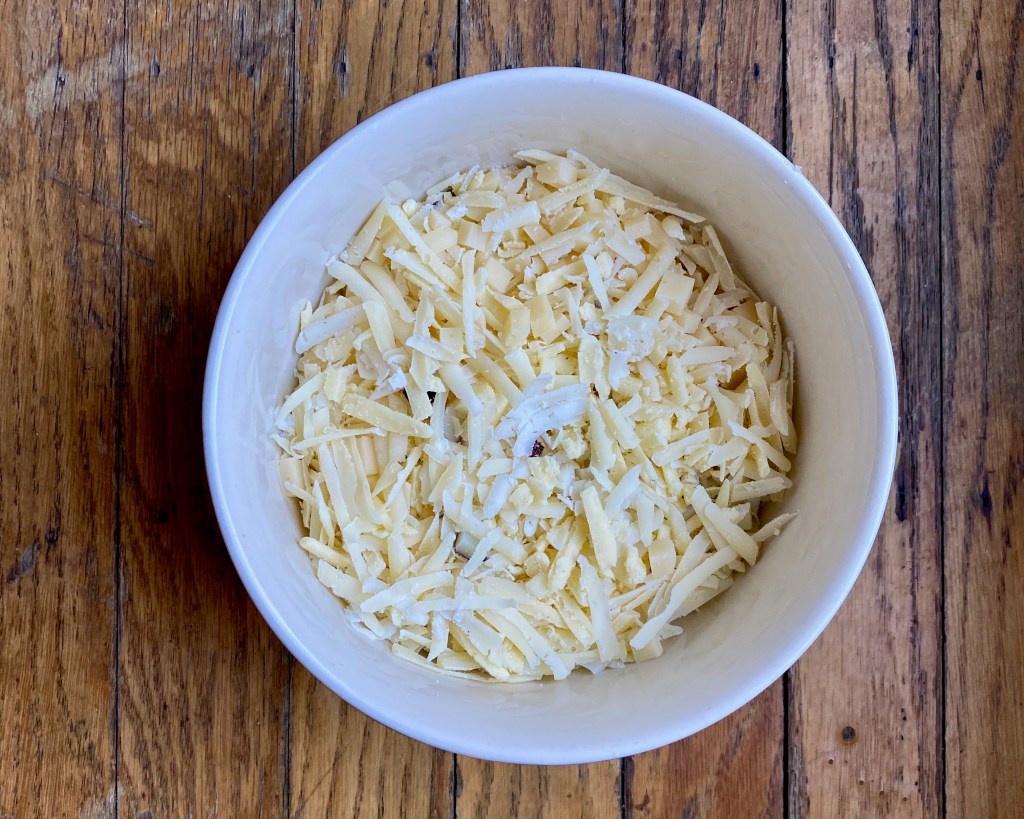
In typical form, I made some tweaks. I used basil instead of fresh tarragon, but parsley, chives, or fennel fronds would also work nicely. I went all-in with Parmesan, but Ottlogenhi’s recipe also uses gorgonzola cheese (I am not a fan, but if you are, you can go half and half with the cheeses). 

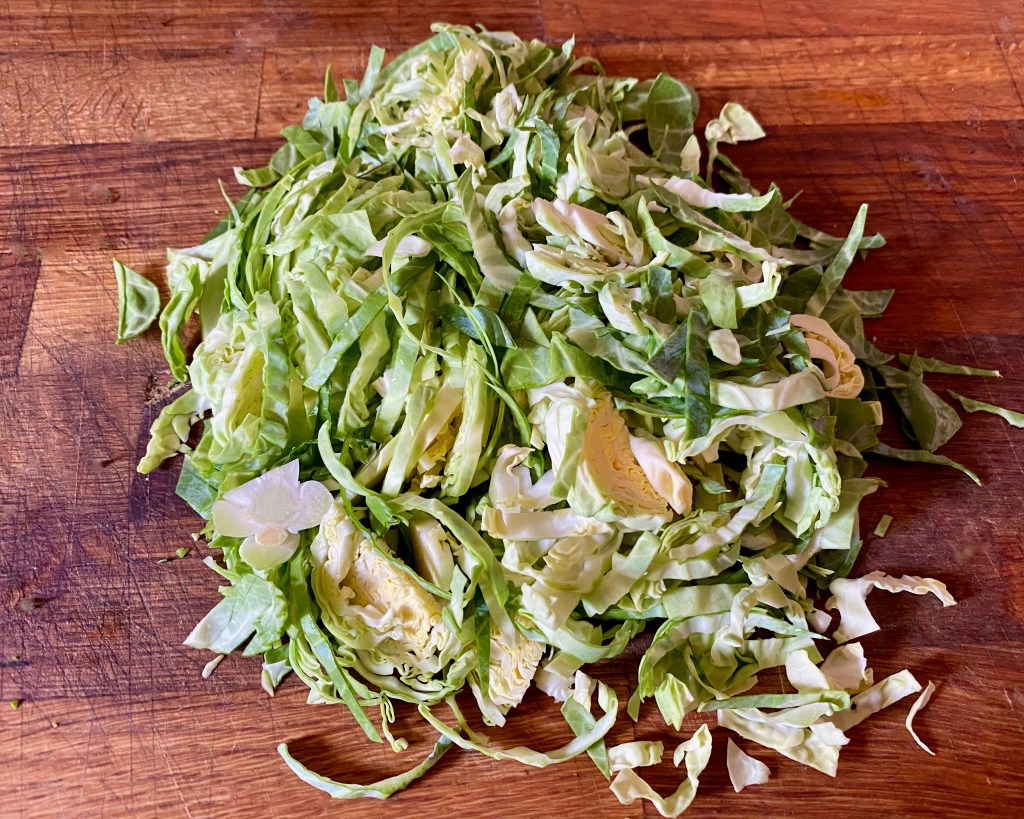
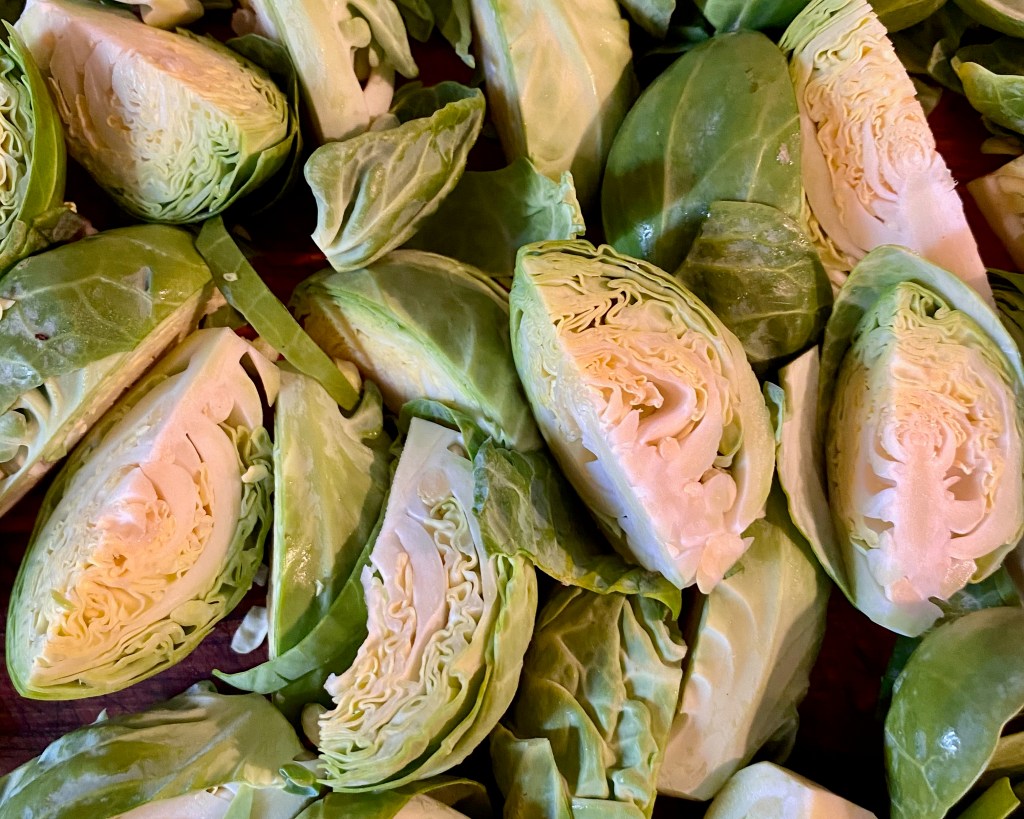
I also forwent frying the brussels sprouts quarters. The first (and only) time I tried to fry them, I made a terrible mess. Rather than destroying my kitchen, I roast the Brussels at a super high heat, which results in crispy Brussels sprouts without the greasy aftermath. 

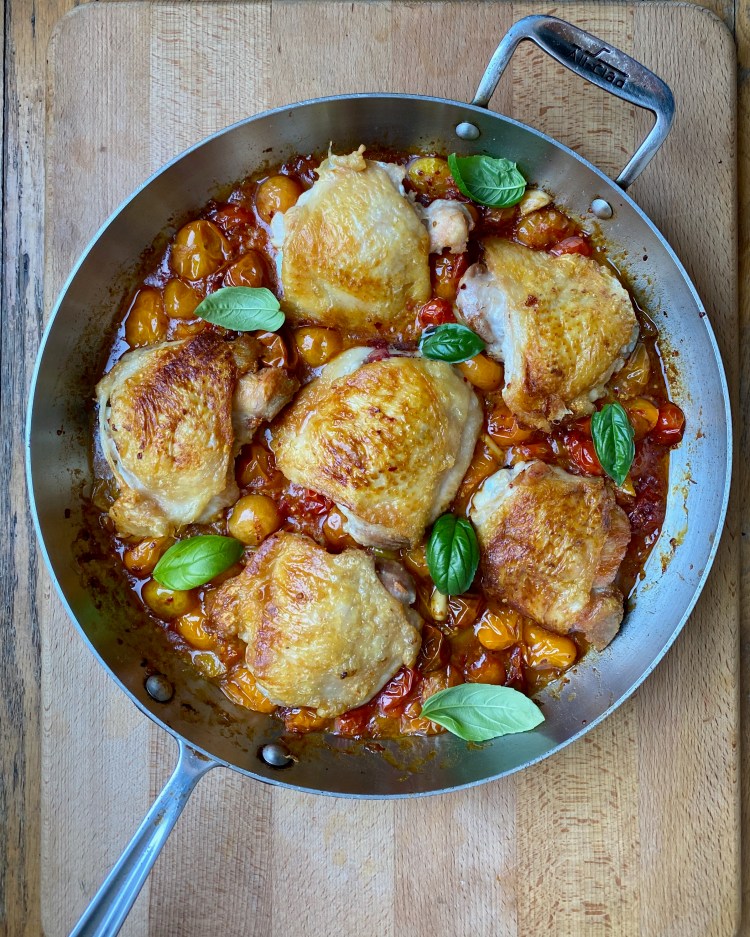
If you have a partner (like me) who doesn’t think its a meal if there isn’t “animal protein”, you can serve this with a simple roast chicken or grilled steak. But otherwise, this is plenty hardy and can be served alone for a delicious, winter meal. 

Ingredients

2 tbsp of butter

3 tbsp of olive oil

2 small white onions, diced

3 garlic cloves, smashed

1 lb of Brussels sprouts, divided, ½ lb shaved and ½ lb quartered

3 tbsp fresh thyme

Strips of zest from 1 lemon

Grated zest from 1 lemon

1 ½ cups of arborio rice

2 cups of white wine

4 cups of chicken or vegetable stock

100 grams of Parmesan cheese (or 50 grams of Parmesan, 50 grams of gorgonzola)

½ cup of tightly packed fresh basil, parsley, chives or fennel fronds

Salt and pepper

Directions

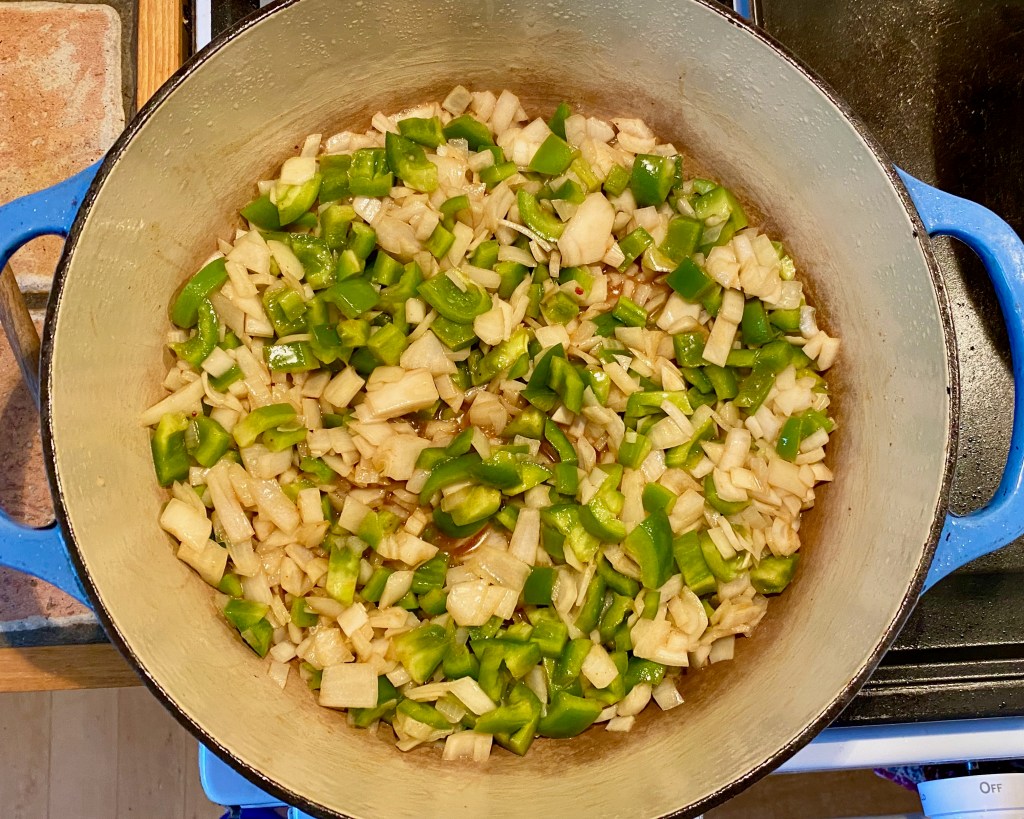
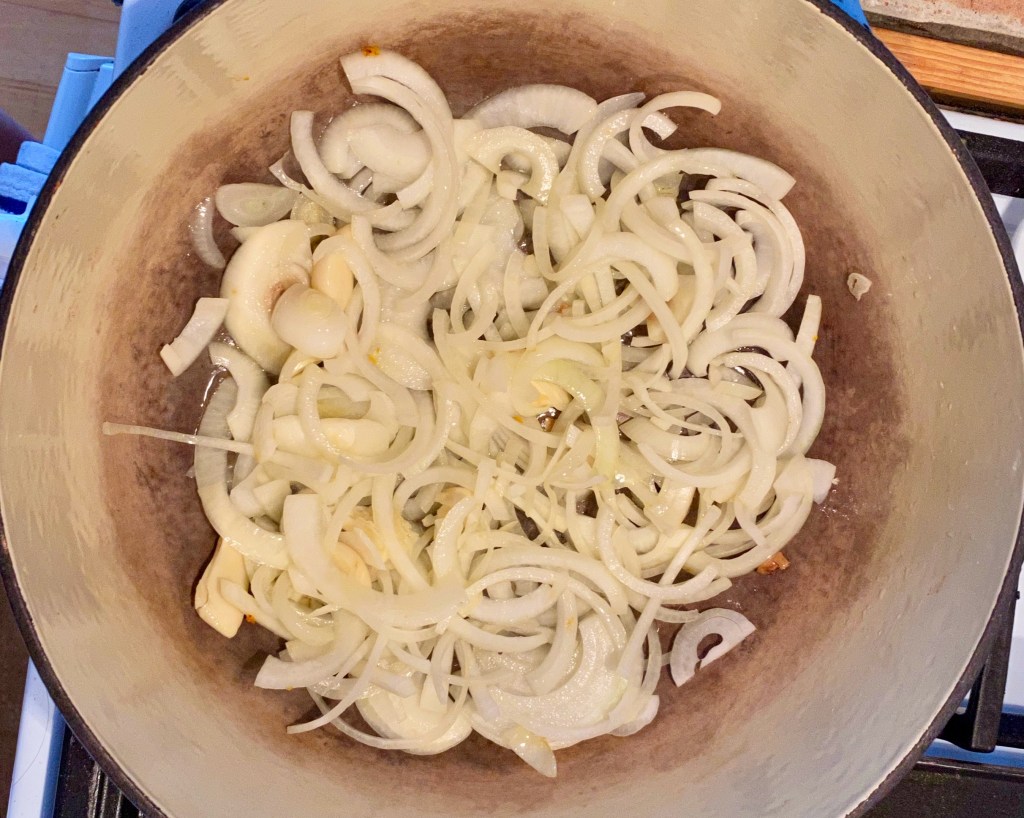
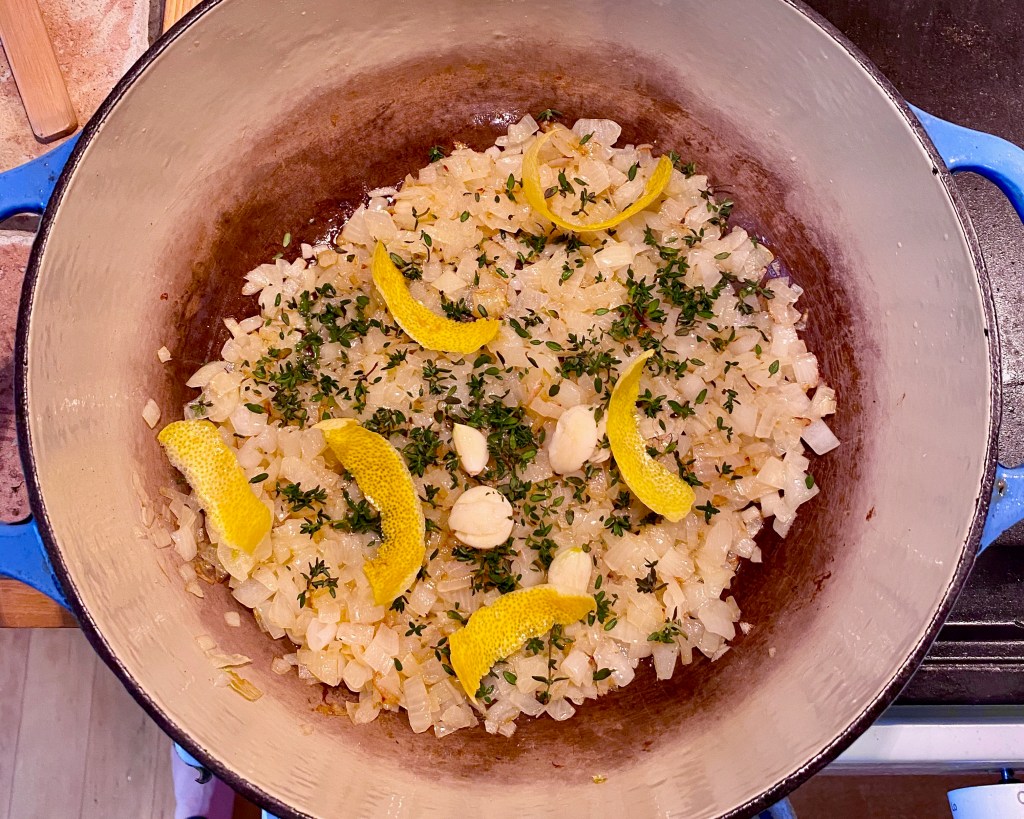
Place a Dutch oven or other large heavy bottom pan over medium-high heat. Add the 2 tbsp butter and 2 tbsp of olive oil, and once shimmering, add the diced onion. Cook for about 10 minutes, stirring frequently until the onion is slightly caramelized. 

Add the lemon strips, thyme, and garlic, cook for two minutes more.

Add the rice and shaved brussels sprouts and cook for 1 minute. 

Add the two cups of wine, ½ tsp of salt, and a good grind of black pepper. Simmer the wine for about 5 minutes, and then start adding the stock, one ladle at a time. 

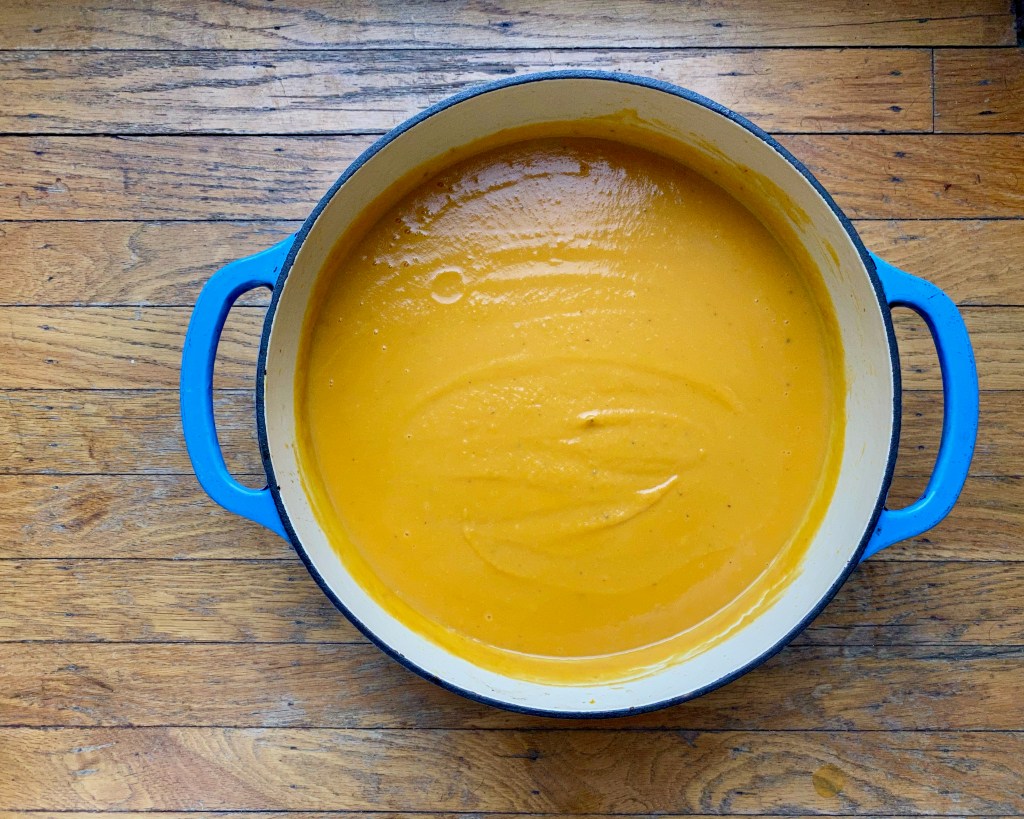
Once the liquid is absorbed, keep adding more stock and stirring frequently, until all the stock is absorbed and the rice is fully cooked, yet still somewhat firm to the bite. If you prefer a softer, soupier risotto, simply add an extra one-half to one cup of broth (or water). 

While the risotto is cooking, preheat your oven to 450 degrees F. Lightly coat the quartered Brussels sprouts with olive oil in a small bowl, then spread out on a baking sheet. Bake for 5 – 10 minutes, keeping an eye on the sprouts so they don’t burn. You want them darkly brown, but not black! Once they are nice and crispy, pull them from the oven and set them aside. 

To finish the dish: Add lemon zest, parmesan cheese, chopped basil, and ½ of the crispy Brussel sprouts to the risotto. Top the dish with the remaining Brussels sprouts and serve with extra Parmesan. 

squash mac and cheese

cheesy puns mac me so happy!

I recently had a disastrous experience at a local SF barbecue spot, that shall not be named for the sake of their reputation. I was craving mac and cheese, but when I received my order, the mac and cheese were cold, the cheese had split, and the flavor was just off. It was an udder mac and cheese-catastrophe… So I started hunting for how to make the best mac and cheese at home. 

For many recipes like this, I turn to my trusty The Food Lab cookbook by J. Kenji Lopez-Alt. This book has the most thoroughly-tested and explained recipes. Not only do I get a great recipe, but I also get a scientific explanation for why the recipe is why it is. 

In The Food Lab, Lopez-Alt explains why American cheese should be used to get that perfect, creamy, mac and cheese texture. While I respect the recipe (and explanation about a low melting point), I am very anti-American cheese on a personal level, so I looked for another idea where I could avoid that ingredient.

However, I did “borrow” his method of soaking noodles in cold water instead of parboiling. Anything that saves me from cleaning an extra pan!

Next, I looked at Smoke and Pickles: Recipes and Stories from a New Southern Kitchen. This cookbook has a unique perspective from Chef Edward Lee, who was raised by Korean immigrants in Brooklyn and then moved to Louisville, Kentucky. His recipes combine Korean roots with a Southern twist. Think a master remoulade with miso or kimchi, ham pho, bacon braised rice, and bourbon-ginger glazed carrots. He also has a recipe for mac and cheese with pork cracklings and black sesame seeds. 

I didn’t want to use pork cracklings, and I am all out of black sesame seeds. However, I was intrigued by his use of roast squash in the cheese sauce. I used Chef Lee’s recipe with a few tweaks, and oh my gourd, it was pasta-ble to make grate mac and cheese at home!

Ingredients

1 small butternut squash (~1 lb)

12 oz of shell noodles

3 oz sharp cheddar

3 oz gouda

3 oz parmesan

1 cup of milk

1 cup of chicken stock, plus more if needed

3 tbsp butter

Salt and pepper

1-2 tbsp of red pepper flakes (to taste)

½ cup of panko bread crumbs

Directions

Preheat the oven to 425 degrees F. Cut butternut squash in half vertically, scoop out seeds, and put face down on a baking sheet. Add ¼ cup of water to the baking sheet and put the sheet in the oven. Bake for 30-40 minutes until squash is tender. Remove from the oven and let cool.

Reduce oven temperature to 375 degrees F.

While the squash is cooking, fill a large bowl with cold water and add the dried pasta. Let pasta soak in the water for 30 minutes.

After 30 minutes, drain the water, and put the pasta back into the bowl. *This method is in The Food Lab for baked pasta dishes. 

Butter a 9 x 12-inch baking dish. 

Once the squash is cool, scoop it out of the skin and put it into a blender. Add the cheese, milk, stock, butter, and nutmeg. Blend until the mixture forms a smooth sauce. Add more stock if needed to thin out. 

Add the sauce to the bowl with the pasta. Mix thoroughly. Pour everything into the baking dish.

Sprinkle top with the panko crumbs.

Cover and bake for 20 minutes. Remove cover and bake for another 25 minutes until panko crumbs are toasty. Serve immediately.

chicken and sausage gumbo filé

New Orleans cuisine has always been my favorite, however I only eat gumbo on oc-cajun

One of my favorite family traditions is going to the New Orleans Jazz & Heritage Festival (aka Jazz Fest), which celebrates the indigenous melting pot of music and culture from the region. The annual Jazz Fest incorporates all types of music, including Blues, R&B, gospel, Cajun, zydeco, Afro-Caribbean, folk, Latin, rock, rap, country, bluegrass, and jazz.  

I attended amazing sets over the years, including but not limited to, Fleetwood Mac, Hall & Oates, Stevie Wonder, The Revivalists, Big Freeda, Usher, Dr. John, Trombone Shorty, and Lake Street Dive.There’s a classic family story about how at age three, I ran away from my uncle to go dance at the front of the stage. What can I say, I have always loved live music!

Besides the fabulous music, Jazz Fest is famous for its amazing food. Mango Freeze, crawfish beignets, cochon de lait sandwiches, alligator sausage po’boy (sandwich), boiled crawfish, softshell crab po’boy, Cajun jambalaya, jalapeño bread, fried green tomatoes, Oyster patties, muffulettas, red beans and rice, and crawfish Monica. My personal favorite is the pheasant and andouille sausage gumbo with a local beer (shout out to Abita!)

The Jazz Fest tradition started because my mom lived in New Orleans in the 70s after she finished grad school. My uncle also moved out to New Orleans for law school, and they both attended the first Jazz Festival in 1970. My uncle had a great story about smoking a joint with Professor Longhair on the night he passed away, but I digress…

My mom learned a few classic dishes, and we grew up eating gumbo and barbeque shrimp. This year, we skipped our annual Jazz Fest trip (another COVID casualty), but my mom got us some traditional andouille sausage from Cochon Butcher for the holidays. So, there was only one thing to do – make some gumbo!

This recipe is what my mom made for us growing up, with a few changes. It makes a large batch, so you can make it for a crowd, plan to eat it for a few days, or freeze some of it for later.

Ingredients

2 green peppers, chopped

2 large yellow onions, diced

¼ cup parsley, minced

3 green onions, thinly sliced

5 garlic cloves, minced

Scant ¼ cup fresh thyme leaves

1 lb andouille sausage, diced into ½ inch cubes (if you can’t find andouille, try kielbasa but add some extra cayenne)

1 lb county ham/sausage, diced in ½ inch cubes

2 ½ lbs chicken legs (thighs & drumsticks), broken down

⅔ cup of vegetable oil

½ cup flour

3 bay leaves

1 tsp cayenne pepper

Salt and pepper, to taste

8 cups of cold water

3 Tbsp filé powder

Directions

Prepare all ingredients before you start cooking. Preheat the oven to 200 degrees F. Take out a baking sheet or oven-safe platter.

Put a large Dutch oven or soup pot on the stove over medium heat. Add vegetable oil to the pot, and warm until shimmering. Brown the chicken pieces in batches, about five minutes each side.

Place the browned chicken pieces on a baking sheet or platter and place in the oven until it is time to add to the gumbo.

Make the roux – Add the flour to the warm oil, stirring, until the mixture is hazelnut in color.

After making the roux, add the onions and green peppers. Cook for about ten minutes, stirring until the vegetables are soft.

Add the garlic, parsley, green onions, and thyme and cook for another three minutes. Add the sausage and stir again to mix. Add the salt, pepper, cayenne, crushed bay leaves, and 8 cups of water. Stir to combine.

Take the chicken pieces out of the oven and add to the gumbo. Bring everything to a boil, reduce the heat, and simmer for 1 hour.

After an hour, turn the heat off and let cool for five minutes before adding the file powder and mixing. Let the gumbo cool for another five minutes, then remove the chicken pieces. I like to remove the skin and shred the chicken before adding it back to the gumbo. You can also leave the chicken pieces whole.

Serve with boiled rice.

sweet potato cake with salted cream cheese frosting

What’s the nicest vegetable? Sweet potato!

I can’t take credit for this cake recipe, but I had a lot of fun decorating it with an absurd number of edible flowers. I asked my brother to pick up some edible flowers (his idea of “some” and my idea of “some” are disparate) so I ended up with five packages of flowers!

My original idea was to artfully place a few edible flowers on top of the cake. This morphed into covering the whole cake with the flowers, lest they go to waste. Taste-wise, the flowers don’t add much, but the cake is a stunner.

If you do decide to decorate with flowers, have fun with it! I covered all of the exposed frosting so the cake looks like a rainbow of colors. You can also skip the flowers, and make it a naked cake.

A warning – this is not a light and fluffy cake. It is dense and moist almost like pumpkin bread.

Don’t be discouraged if it doesn’t rise much after baking. On the positive side, because it is so dense, it doesn’t dome at the top, so you don’t have to level the cakes after baking. I am terrible at leveling, so this is a win in my book!

I made a few changes to the original Bon Appetit recipe below, which are integrated below. I use coconut oil instead of vegetable oil in the cake batter because that’s what I had. One teaspoon of ground ginger went into the cake batter for a spicy element. Orange zest is added to the frosting for citrusy brightness. Less powdered sugar is used, because 6 cups of powdered sugar is plenty sweet!

The recipe makes a ridiculous amount of frosting. I used a very heavy hand on the cake and there is still a Tupperware full of frosting left in my aunt’s refrigerator. I bet it would go great with french toast, or save it for another cake.

Ingredients

FOR THE CAKE

1½ lb. sweet potatoes (about 4 medium), scrubbed

Nonstick vegetable oil spray (for pans)

3¼ cups (374 g) cake flour, plus more for pans

2 tsp. baking powder

1½ tsp. ground cinnamon

1 tsp. ground nutmeg

1 tsp. ground ginger

½ tsp. Diamond Crystal or ¼ tsp. Morton kosher salt

1½ cups (300 g) granulated sugar

1½ cups (packed; 300 g) light brown sugar

½ cup (1 stick) unsalted butter, melted, slightly cooled

7 Tbsp. coconut oil

1 Tbsp. vanilla extract

5 large eggs, room temperature

FOR THE FROSTING

2 16-oz. packages full-fat cream cheese, room temperature

1  cup (2 sticks) salted butter, room temperature

6 cups powdered sugar, sifted or whisked to remove lumps

1 Tbsp. vanilla extract 

½  tsp. Morton kosher salt, plus more to taste

Zest of 1 orange

Directions

LET’S BAKE! Cook sweet potatoes in a medium pot of boiling water, stirring occasionally until a tester inserted into centers meets no resistance, 40–45 minutes. Drain and let sit until cool enough to handle. Remove skins, transfer flesh to a medium bowl, and mash with a potato masher or fork. Let cool.

Preheat oven to 350°. Spray three 9″-diameter cake pans with nonstick spray, then line bottoms with parchment paper rounds. Spray parchment and dust pans with flour, tapping out excess.

Sift baking powder, cinnamon, nutmeg, ginger, salt, and 3¼ cups (374 g) cake flour into a large bowl (or just whisk to remove lumps). Combine granulated sugar, brown sugar, butter, oil, and vanilla in the bowl of a stand mixer fitted with the paddle attachment. Beat on medium-high speed until light, fluffy, and no lumps remain, about 5 minutes.

Add eggs to sweet potato purée and mix well. Scrape into sugar mixture and beat to combine, scraping down bowl as needed. Reduce speed to low and with motor running, gradually add dry ingredients; mix just until incorporated. Divide batter evenly among prepared pans. Bake until cakes slightly rise, tops are set, and a tester inserted into the centers comes out clean, 25–30 minutes.

Transfer pans to a wire rack, and let the cakes cool in pans for 5 minutes. Run a small knife around the edges of cakes and turn out onto racks. Remove parchment and let cool completely (rounded side down). Tightly wrap cakes individually in plastic and freeze until thoroughly chilled (this will make cakes easier to frost), about 2 hours.

MAKE THE FROSTING: Beat cream cheese and butter in the bowl of a stand mixer fitted with the paddle attachment on high speed until smooth and creamy, about 1 minute. Add powdered sugar, vanilla, and salt and beat on low speed for 30 seconds (place a kitchen towel over the bowl to capture any puffs of sugar). Increase speed to high and beat frosting 2 minutes. It should be thick and creamy. Add the orange zest and beat just to combine. 

LET’S ASSEMBLE! Place a cake, right side up, on a large plate or cake stand. Spread one-third of frosting on top. Set another cake on top and frost with half of the remaining frosting. Repeat the process with the remaining cake and frosting. For the cleanest slices, chill 3 hours before slicing. 

butternut squash soup

You butternut squash my heart

Every Thanksgiving, my family heads up to beautiful wine country to spend the holiday with my uncle, aunt, and cousin. I only ate butternut squash soup once a year at Thanksgiving, and it was one of my favorites. It wasn’t until I was in my early teens that I took an interest in cooking and I asked my aunt how she made the soup. She let me in on a little secret –it was from Dean & Deluca!

As I got older and started contributing to the Thanksgiving meal, I always offer to make butternut squash soup, going on almost 10 years now. It’s amazing how simple it is to make with the option for many, many variations. 

The biggest take-away I learned is that using homemade stock is critical. It is still delicious if you use water, coconut milk, or bouillon, but using homemade stock adds complexity and body to the soup that is hard to mimic with only vegetables. 

I am overdue for a post about a homemade stock, but my quick method is the following: throw a chicken carcass or 1 lb of chicken bones into an Instant Pot, along with an onion, 1 celery stalk, 1 carrot, 1 head of garlic, and 1 dried red chile (optional). Fill the Instant Pot with water, and pressure cook for 1 hour. After it cools, strain out the liquid and discard the rest. Voila! You now have beautiful bone broth to add to soup, risotto, stews, or anything else you like.

The other important thing is to roast the butternut squash. Roasting the squash, instead of boiling or steaming it, adds caramelization (aka FLAVOR) to the soup. This just takes it to the next level. 

I didn’t add extra spices to this recipe (because I didn’t have any on hand) but you can add fresh thyme, rosemary, or sage to the butternut squash before it goes into the oven.

Ingredients

1 large butternut squash, or 2 small (about 4 pounds)

~4 tablespoons of olive oil

2 yellow onions, sliced

5 garlic cloves, smashed

1 bay leaf

4 cups chicken stock (preferably homemade)

Salt and pepper

¼ cup pumpkin seeds

Optional: 1 tbsp of an additional herb like thyme, rosemary, or sage

Directions

Preheat the oven to 425 degrees F. 

Using a vegetable peeler, remove the skin from the butternut squash. Cut the squash in half lengthwise, and then widthwise. Use a large spoon to scoop out the seeds and set seeds aside. Cut the squash into roughly 1-inch cubes and add to a large mixing bowl. Drizzle with 2 tablespoons of olive oil, 1 tablespoon of salt, and lots of fresh ground pepper. Add to a large baking pan and spread the squash evenly.

Throw in the oven and bake for 45 – 1 hour. The cooking time depends on the temperature of your oven, how large the pan is, etc. I cook the squash until it caramelizes, which adds a lot of flavor to the soup. 

Once the squash has caramelized, remove it from the oven, and set aside. Add the remaining 2 tablespoons of olive oil to a large dutch oven over medium heat. Once the oil is warm, add the onions and garlic.

Cook, stirring frequently until the onions have taken on color.

Add the butternut squash to the Dutch oven and stir to combine with the onions.

Add the chicken stock and bring to a boil.

Once the stock is boiling, bring down to a simmer, and leave for 10 minutes to let the flavors combine. After 10 minutes of simmering, remove from heat and let cool. 

After the soup has cooled, using an immersion blender or regular blender, blend the soup until smooth. This usually takes a few minutes, you want to blend until it is silky smooth. 

Taste the soup and check for seasonings. It may need salt and/or pepper. If you like a little heat, add some red pepper. If you want an herbaceous note, add some thyme or rosemary. You can also go a sweeter route and add cinnamon, nutmeg, or clove. 

When ready to serve, heat a small pan over high heat, and add the pumpkin seeds. Toast the seeds until lightly brown (no more than one minute), and add a sprinkle to each bowl. 

what’s your favorite thanksgiving soup?

one-pan plums and sausage

this recipe is plum perfect!

I love the concept of one-pan dinners. One of my favorite dinners is more of a guideline than a recipe. Coat some vegetables with olive oil and spices, throw on a large baking sheet, and top with a protein.

A couple weeks ago, my brother hosted me for dinner and made Sticky sweet-and-sour plums and sausages. Normally I fall head over heels for Ottolenghi recipes. But I wanted less potato and more of the sticky, sweet, and sour plums.

I took the concept of using plums and sausages from Ottolenghi, but applied my general guidelines for a one-pan dinner. I played with the proportions (more plums, no potatoes) to come up with a tray bake that lets the roasted plums shine.

Plums are a summer stone fruit, but you can buy them at stores year-round. They vary on the spectrum between sweet and sour, but roasting them brings out the sweetness. I added lemon juice for acidity, and a hint of honey to bring out the sweetness.

Pork and fruit are a classic combination. I use a spicy Italian pork sausage that plays well with the sweet fruit. But you can use any type of sausage that you like.

I serve this with a simple green salad and some bread to soak up the sauce.

Ingredients

8 pork sausages (or any type of sausage you prefer)

10 cloves of garlic, smashed

~2 lbs plums, halved

2 large red onions, peeled and cut into wedges

¼ cup of olive oil

1 lemon, juiced

1 tablespoon of honey

Salt and pepper

Fresh basil for garnish

Directions

Preheat the oven to 425 degrees F. Whisk together the olive oil, lemon juice, honey, salt, and pepper in a large bowl. Add the halved plums, red onions, and garlic to the bowl and toss to coat. 

Spead the plums and red onion on a large baking sheet or cast iron pan.

Place the sausages on top of the fruit mixture and bake for 35 – 40 minutes until everything is nice and brown. The plums will be broken down and the sauce will be bubbly. Remove from the heat and garnish with torn fresh basil. 

soft date and oat bars


A date, a peanut, and an oat sit down and order a drink. The bartender says, “what do you think this is, a granola bar? “

Recently I read Why You Eat What You Eat: The Science Behind Our Relationship with Food by Rachel Herz. You can imagine why the title piqued my interest. I am obsessed with cooking, photographing, and writing about food.

Herz explains why sweeter (nicer) people prefer sweet foods, and people with a bit of attitude prefer bitter or sour foods. T.V or other distractions makes us eat more than if we were to eat doing nothing else. Aromas are the most important element of eating, even over our taste buds! Meditation and working out are the best ways to establish more willpower if you have trouble limiting your number of trips to the buffet table.

In a surprise to no one, in a book all about our eating habits, there is a chapter all about comfort food. How can you talk about humans’ relationship to food without diving into the reasons we are so attached to eating? According to Herz, comfort foods cause an increased release of endorphins, so they are a legal version of heroin. Endorphin release is also related to comfort and pleasure that we associate with past experiences. When we eat comfort food it’s an intimate reminder of positive emotions associated with certain foods.

Granola bars are one of my (many) comfort foods. I remember eating quaker oats chocolate chip granola bars after school as a kid. These are a hybrid of a cookie and a granola bar. They feel somewhat virtuous due to a combination of oats, nuts and/or seeds, and some dried fruit.

This is a “Jessie-fied” version of a recipe from Ottolenghi’s Simple. I use peanuts instead of tree nuts, honey instead of date syrup/corn syrup, and lemon zest instead of orange zest. I am telling you this to show how versatile this recipe is. As long as you use the same proportions, you can get away with swapping most of the ingredients. I always like to have some flexibility depending on what is in the pantry at the moment.

Ingredients

⅔ cup roasted and salted peanuts

2 cups of rolled oats, divided

¼ cup roasted sunflower seeds

¼ cup roasted pumpkin seeds

9-10 pitted Medjool dates (5 oz)

200 grams salted butter

⅔ cup of coconut sugar

¼ cup honey

Zest of 1 small lemon

Pinch of sea salt

Directions

Preheat oven to 350 degrees F. Butter a 12 x 8-inch pan and line it with parchment paper. 

Add the peanuts to a food processor, and pulse to pulverize. You want very small pieces, but not so small it’s the texture of sand. Or, if you really go too far, you will end up with peanut butter. 

Add processed peanuts to a large bowl. Then add 1 cup of the oats to the food processor and the other 1 cup of oats to the large bowl with the peanuts. Pulse the oats to process into small pieces, but don’t take it to the texture of oat flour. Transfer to the large bowl. 

Add the seeds to the bowl. Chop the dates and add them as well. 

Roughly cut up the butter into chunks and add to a small saucepan over medium heat. Add the coconut sugar, honey, and lemon zest. Let the wet ingredients warm up and gently mix together. Keep stirring until the butter is melted and it has come together. Pour over the oat mixture and mix thoroughly to combine. 

Pour everything into the parchment-lined pan. Using a small spatula or spoon, lightly press down and even out the top of the bars.

Place in the over to bake for 35 minutes. 

Let cool in the pan. Cut in half lengthwise, and six times widthwise into 12 rectangular bars.

You can immediately eat (they will be quite soft) or let them harden in the fridge to firm up.

what’s your favorite comfort food?

reese’s pb cups (sugar free)

have i ‘reese’-ently told you how much i love these?

A couple of times a year, I break-up with sugar. It’s a nice reset that lasts 30 days. The first week is the hardest and then it gets progressively easier each week. My sleep quality improves, my energy is high, and my skin looks amazing. 

I love super dark chocolate (85% or higher) so I get some some sugar-free chocolate to help me get through the month. I am not a masochist. Lily’s makes good quality sugar-free chocolate options, I get mine at Whole Foods.

My favorite food pairing is chocolate and peanut butter, so it’s no surprise that Reese’s peanut butter cups are my preferred candy. Halloween is around the corner, so I wanted to try and make sugar-free version of Reese’s peanut butter cups while I am on a no-sugar kick. 

This is a super simple recipe, so simple, that I hesitate to put it on the blog. But I decided to share this because maybe some of you are also trying to reduce your sugar intake. And these have been a great way to curb my sweet tooth while I am trying to be more virtuous. The hardest part is waiting for them to freeze!

I made them in regular muffin tins, but they too large (if there is such a thing when it comes to chocolate and peanut butter cups). I recommend mini-cupcake tins.

Ingredients

9 ounce bag of Lily’s sugar free dark chocolate baking chips

1 tbsp of coconut oil

6 tsp salted smooth peanut butter

Sea salt

Directions

Line the mini-muffin tins with liners.

Place the chocolate chips in a medium microwave-safe bowl.

Melt chocolate in the microwave for 1 min, stir, and then pop back in the microwave for another 30 seconds.

Add in the coconut butter and stir, until the chocolate is velvety smooth.

Spoon a small teaspoon of melted chocolate into each of the muffin tins, and smooth out the top.

Pop into the freezer for 10 minutes. After the first layer of chocolate is hard, take out of the freezer.

Put a ½ teaspoon of peanut butter in the center of each tin.

Put back in the freezer for ten minutes. Take out again, and cover the peanut butter with another teaspoon of chocolate. You may need to warm up the chocolate again, so it melts over the peanut butter.

Sprinkle the top of each cup with sea salt, and put back in the freezer for another 20 minutes.

At this point, they will be frozen, and you can put them in the fridge to store.

what’s your favorite Halloween candy?

chicken musakhan

My love of all things Ottolenghi knows no bounds, so I was thrilled when my brother gifted me with Falastin: A Cookbook by Sami Tamimi and Tara Wigley. Alongside Yotam Ottolenghi, Sami Tamimi is the co-author of two bestselling cookbooks, Ottolenghi: The Cookbook and Jerusalem: A Cookbook. Both books are well loved and used in my kitchen. 

Falastin is not merely amazing recipes, but interwoven with the personal story of Tamimi and the history of the Palestinian people. Did you know that there is no letter “P” in the Arabic language? So Palastinians refer to themselves as “Falastinians.” Hence the title of the book. 

Musakhan is the hugely popular national dish of Palestine, and Tamimi explains when growing up, he ate this once a week. It’s a dish you eat with your hands and among friends.

I was drawn to this recipe for two reasons. First, nothing makes me happier than cooking for a crowd, and second, the copious amount of red onions! I love anything with onions, and in this recipe three red onions are thinly sliced, sauteed in olive oil until soft, and coated with sumac and cumin. Next time, I will be sure to make extra onions to add onto sandwiches, salads, or eggs. 

I made a couple substitutes based on what I had on hand. I used chicken thighs instead of a whole chicken – and I think this recipe is fairly interchangeable so long as you use chicken with the bone-in and skin. The spice combination calls for allspice (which I did not have) so to save myself from a trip to the store, I swapped in nutmeg and cloves. I am allergic to pine nuts, so instead I used sunflower kernels. These were fairly minor changes that did not impact the overall flavor of the dish, so you can follow my lead or stick to the original recipe. 

Ingredients

3 lbs chicken thighs (or 1 whole chicken, cut into parts)

~ ½ cup olive oil

1 tbsp ground cumin

3 tbsp sumac

½ tsp ground cinnamon

¼ tsp ground nutmeg

¼ tsp ground cloves (or ½ tsp allspice in lieu of nutmeg and cloves)

Salt and black pepper

¼ cup sunflower kernels (or pine nuts)

3 large red onions

4 pita or flatbreads

¼ cup parsley leaves, roughly chopped

1 ¼ cup greek yogurt

1 lemon, cut in wedges

Directions

Preheat the oven to 425 degrees F. Line a rimmed baking sheet with parchment paper, and line a bowl with paper towels.

Place the chicken in a large mixing bowl with 2 tbsp of oil, 1 tsp of cumin, 1½ tsp of sumac, the cinnamon, nutmeg, clove, 1 tsp of salt, and a grind of black pepper. Mix well to combine, and then spread out on the prepared baking sheet.

Roast the chicken for 45 minutes, or until it is cooked through. Remove from the oven and set aside, but don’t discard any juices that have collected in the pan.

Put 2 tbsp of oil in a large saute pan, and place over medium heat. Add the sunflower kernels in the pan and sautée until golden brown. Transfer to the prepared bowl with a paper towel and set aside. Add the remaining ¼ cup of the oil to the pan, along with the onions and ¾ tsp of salt.

Return the pan to medium heat for 15 – 20 minutes, stirring frequently, until the onions are soft and pale golden, but not caramelized. Add 2 tbsp of sumac, then the remaining 2 tsp of cumin, and a grind of black pepper and mix well until the onions are coated. Remove from heat and set aside. 

When ready to assemble, preheat the broiler and slice or tear the pita into fourths or sixths. Place under the broiler for 2 – 3 minutes, to crisp up, then arrange on a large platter.

Top the bread with half of the onions.

Followed by all of the chicken and any chicken juices left behind in the pan.

Either keep each piece of chicken as is, or roughly shred it, into large chunks. Spoon the remaining onions on top, sprinkle with sunflower seeds, parsley, remaining 1 ½ tsp of sumac, and a drizzle of olive oil. Serve at once with the yogurt and lemon wedges. 

what’s your favorite Falastinian dish?

skillet tomato chicken

Why was the tomato on a motorbike? He was trying to ketchup with his friends

‘Tis the season for tomatoes, and I am eating heirloom tomato salads and BLTs on repeat. Summer will be over before you know it, so take advantage of the produce now! 

The origin of this simple, 45-minute, and 1-skillet recipe is a braised chicken dish made with canned, crushed tomatoes. With an abundance of cherry tomatoes in my larder, I tried the same recipe using fresh tomatoes instead of canned. Folks, we have a winner! 

In general, I reach for chicken thighs instead of chicken breasts because I am a dark meat kind of gal. Also, chicken breasts have to be watched like a hawk, because if cooked for too long, they turn into a chewy, dry, and unpleasant eating experience. On the other hand, chicken thighs are almost impossible to overcook because they have a higher fat content.

I use skin on, bone-in chicken thighs for optimal flavor – the crispy skin adds texture and the bone enriches the meat while cooking. Try to get the best chicken possible. I always buy organic and cage-free – It may sound pretentious, but the flavor is really much better.  

Adding preserved lemons to a sauce gives it that extra zing. If you don’t have preserved lemons, it’s all good – just add some lemon juice to the tomatoes before you put the chicken back in the skillet. I like to finish with basil (from our plant!) but any fresh herb will do. 

Ingredients

~3 pounds skin on, bone-in, chicken thighs (6 pieces)

2 pints of cherry tomatoes

1 head of garlic, cloves peeled and smashed

1 preserved lemon, roughly chopped

1 tablespoon of harissa chile flakes, or other red chile flakes (such as aleppo or calabrian)

2 teaspoons of salt, plus more to taste

Fresh basil to garnish

Directions

Preheat the oven to 350 degrees F. 

Pat the chicken dry with a paper towel and sprinkle ~2 teaspoons of salt all over. 

Place a large skillet over medium heat and wait for the pan to get hot (about 3 minutes). When the pan is hot, add the chicken thighs skin side down. Then walk away!

No seriously, leave the chicken alone while the skin browns. This will take about 5-7 minutes, but the chicken will tell you when it is ready. It’s ready when it lifts on the pan easily, so if the chicken is giving you any resistance, leave it cooking. Once the chicken releases from the pan, put aside on a large plate. 

To the same pan, add the cherry tomatoes and cook for about 5 minutes. Add the smashed garlic and cook for 10 minutes, gently shaking the pan every 1-2 minutes.

You want the tomatoes to start releasing their juices, so some are still whole and some are crushed. Then add the chopped preserved lemon and harissa chile flakes, stir, and cook for 5 more minutes. 

At this point the sauce should smell fragrant and the tomatoes should be juicy. Carefully place the chicken thighs skin-side up back into the pan, nestled among the tomatoes. 

Place the whole skillet in the oven and cook for 12-15 minutes, until the chicken juices run clear. I use a meat thermometer and make sure all the pieces are at 165 degrees. 

Scatter freshly torn basil across the top, and serve with crusty bread and a simple green salad. 

what’s your favorite summer dinner?