zhoug

Spicy, zesty, fragrant, delicious

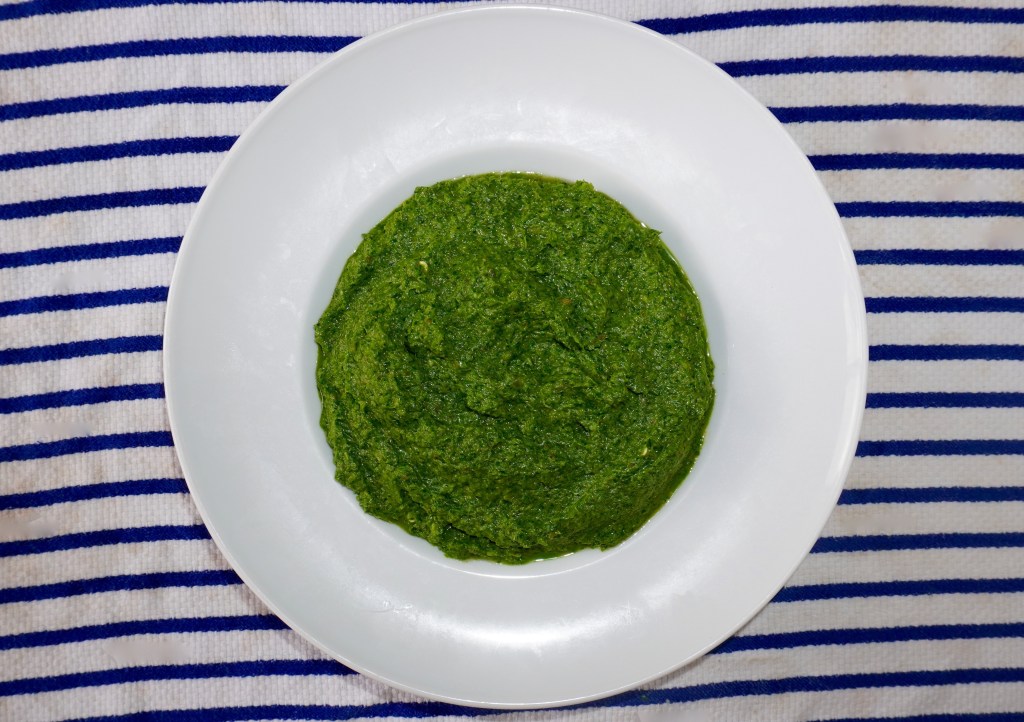
A flavorful green sauce made with fresh herbs is common in many cultures and each sauce has many regional variations! Argentina and Uruguay have chimichurri, made with chopped parsley, olive oil, red wine vinegar, garlic, and red pepper flakes. North Africa has chermoula, which is mostly cilantro, garlic, lemon, and a blend of smoky spices like cumin and paprika. Mexico has sala verde made with tomatillos and fresh green chiles. Italy (of course) has pesto, traditionally made with garlic, pine nuts, basil, a hard cheese like Parmigiano-Reggiano, and olive oil. My favorite lately is the Yeminite green sauce zhoug that is bright and spicy.

We can thank Trader Joe’s for introducing zhoug into our lives. A couple of years ago, we grabbed a container of the green stuff hanging out with the hummus and tzatziki dips. Now a trip to Trader Joe’s isn’t complete unless we get that good good. I set out to replicate the zhoug from Trader Joe’s, but making any type of green sauce at home is easy!

I have two ingedient lists below. The first list is for making zhoug (or a close approximation to zhoug). The second list is for making a “kitchen sink” spicy green sauce with what you have available. Maybe you don’t have red wine vinegar, but you have lemon juice. If you don’t like spicy food, use one pepper instead of three. Use whatever fresh herbs you have available as long as the total volume roughly 4 to 5 cups. You can add more (or less) dried chiles, cardamon, coriander, cumin… it’s hard to go wrong. I do prefer using garlic over onions or shallots because it has more of a kick. 

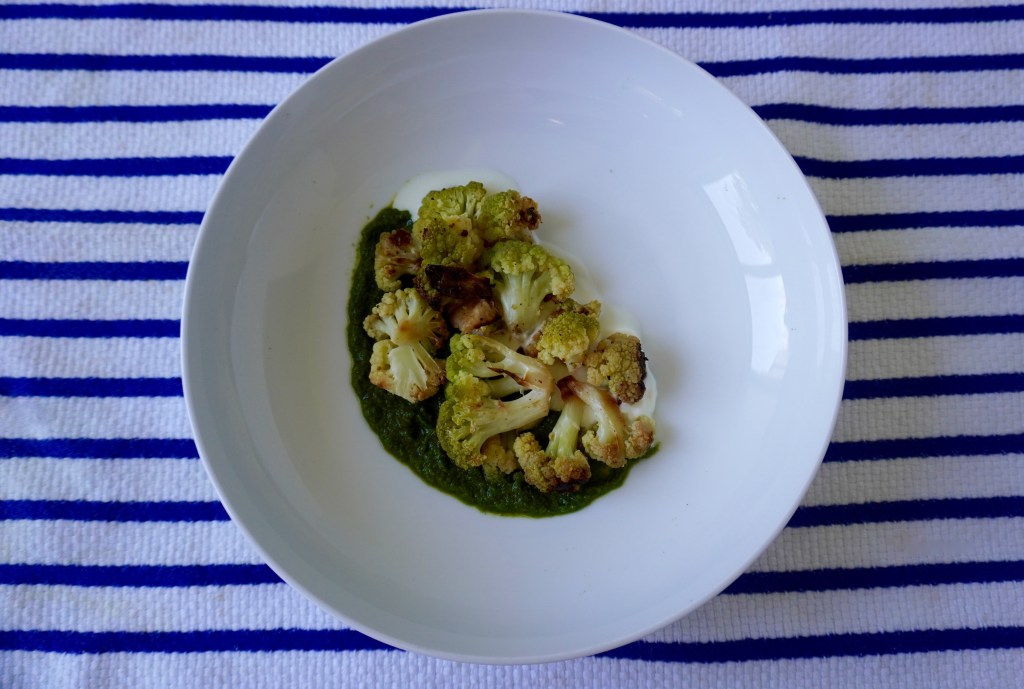
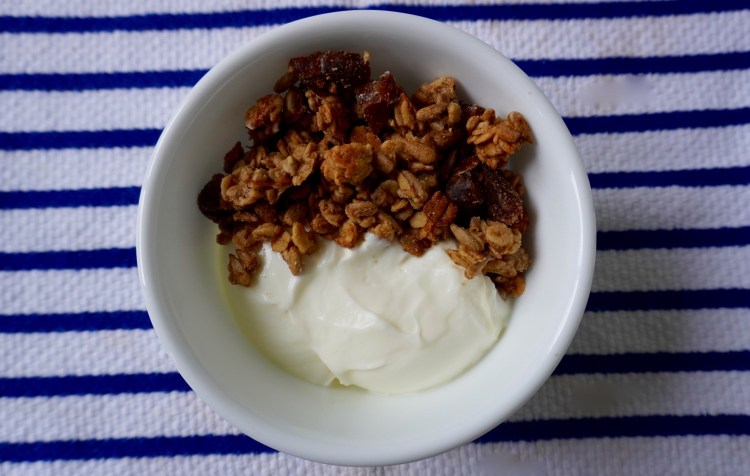
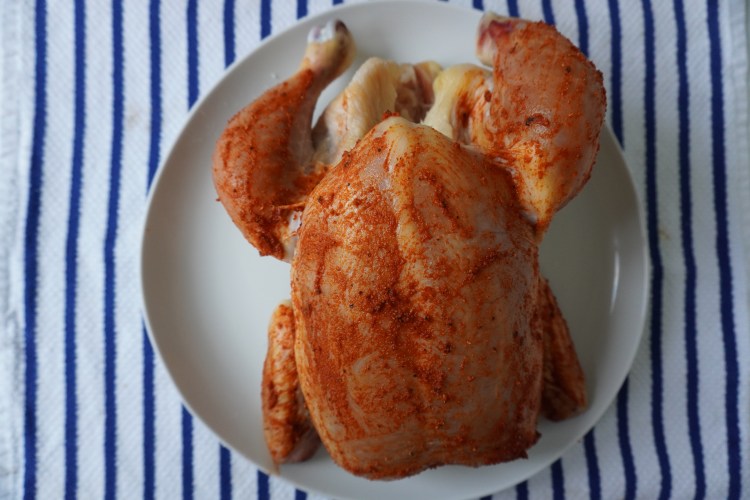
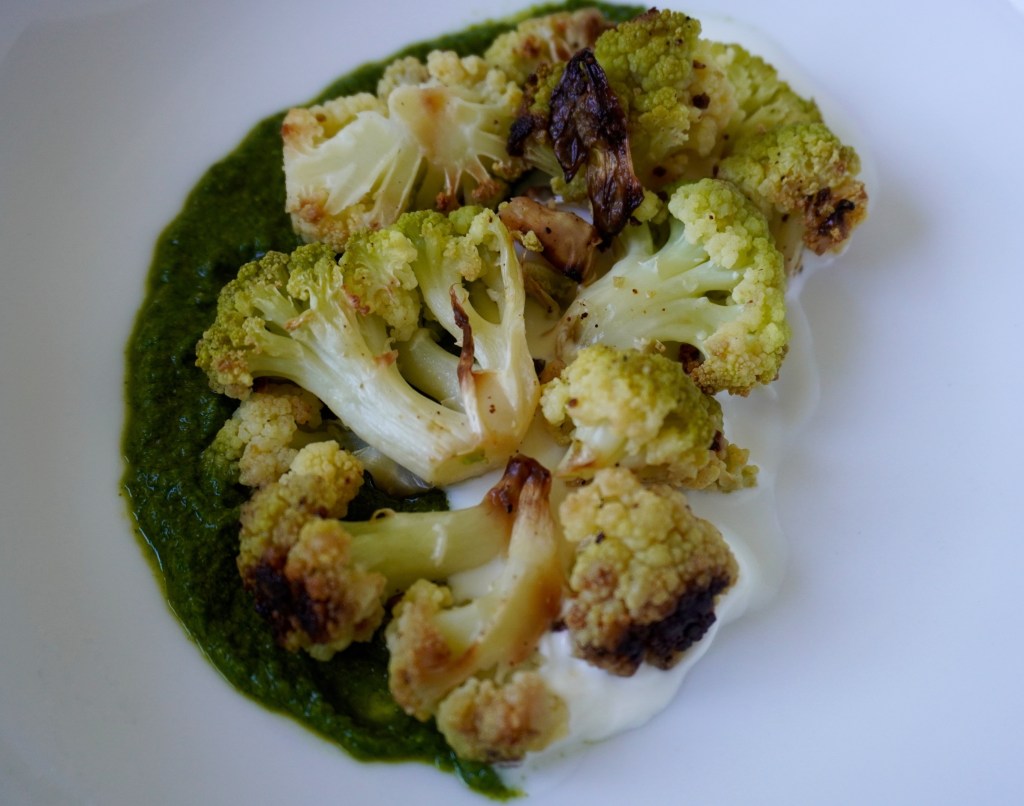
Wondering what to serve the zhoug with? LITERALLY EVERYTHING. Roast veggies, chicken or fish. On top of a savory oatmeal bowl. As a dip for crudite or a make-shift salad dressing. Sometimes when I am feeling fancy, I serve with a swoosh of yogurt to counterbalance the heat – doesn’t hurt that it looks pretty on the plate either!
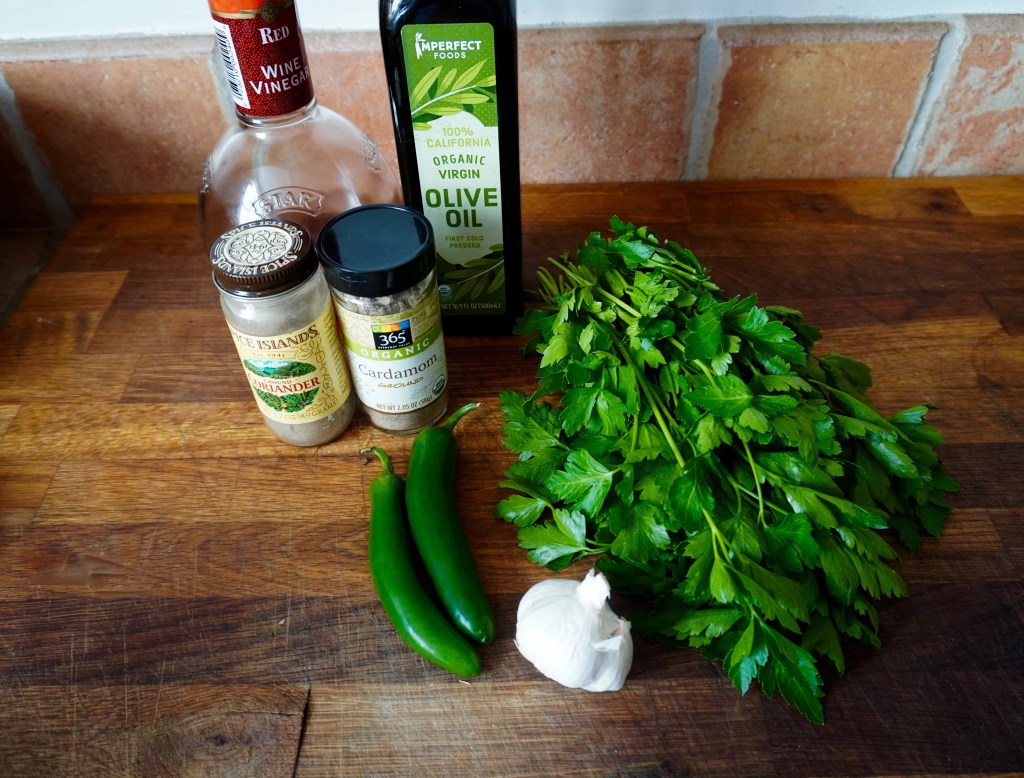
pretty, right?

Ingredients (zhoug)

1 bunch of cilantro, roughly chopped

1 bunch of parsley, roughly chopped

2-3 serrano chiles, roughly chopped

4 garlic cloves, roughly chopped

½ cup good quality olive oil, plus more if needed

¼ cup red wine vinegar

1 teaspoon of salt 

½ teaspoon coriander

½ teaspoon of cardamom

fresh ground black pepper (to taste)

Directions

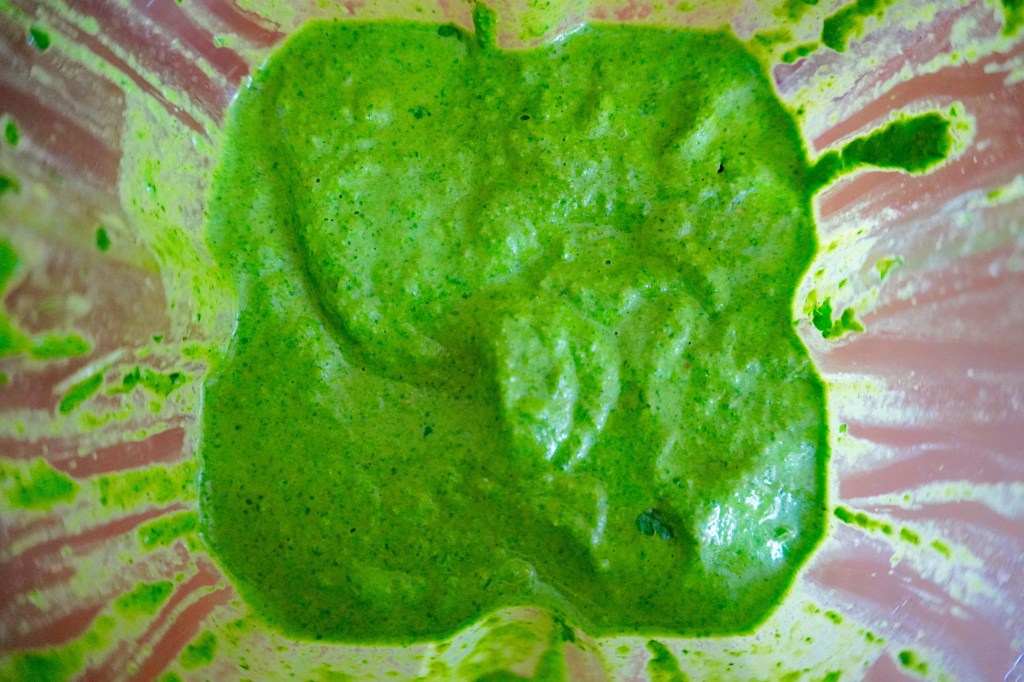
In a blender or food processor, add all the ingredients and pulse until everything is roughly combined. Sometimes I need to add a little more olive oil to make it come together. Then blend until smooth. 

Ingredients (kitchen sink green sauce) 

4 – 5 cups of herbs, roughly chopped (parsley, cilantro, mint, basil)

4 garlic cloves, roughly chopped

½ cup good quality olive oil, plus more if needed

¼ cup red wine vinegar, lemon juice, apple cider vinegar.. any acid really

1 teaspoon of salt 

½ teaspoon coriander or other spice of choice

1 teaspoon of cardamom (or other spice of choice)

Fresh ground black pepper to taste

Directions

See above (same instructions as for the zhoug)

best granola

I dare you to make it last a week

Is intermittent fasting the new juice cleanse? There are many folks on the internet right now making noise about intermittent fasting: only eating during a set time window (say 12-8pm) so you fast for 16 hours a day. Some people claim this is beneficial for health reasons and I am not one to discredit anything that works for another person, but there is no way I am giving up one of my meals – especially breakfast! If I don’t eat breakfast, I would turn into a hangry monster by noon, and F and my co-workers don’t deserve to deal with that. Do you agree that breakfast is not only the most important but also the most delicious meal? Great, we can be friends then.

I typically do food prep on Sunday and make a big batch of something we can eat for breakfast during the week. The standard line-up includes vegetable frittatas, steel-cut oats and homemade granola. Granola is the recipe I keep coming back to because it is delicious and versatile. You can eat it with yogurt, milk or straight from the container and it works for breakfast, a snack, or dessert. I personally love the kind that stays together in clumps, but if you prefer your granola looser, just give it a stir when it comes out of the oven to break up the chunks. I won’t pretend that this recipe has no sugar or fat, but it’s all about moderation. This granola won’t derail your health goals so long as you don’t eat the whole pan in one sitting, which sounds easy but I am telling you it’s not. I have to restrain myself because it smells so tasty fresh from the oven!

This recipe is customizable – depending on what you have in your pantry and your food preferences. You can use any combination of nuts and seeds, just as long as the total volume is 1 ½ cups. I sometimes swap the tahini for peanut butter, and if you don’t have a nut allergy (like I do), I am sure almond or cashew butter would be delicious. Honey works well instead of maple syrup, but I have not tried using regular sugar so I can’t vouch for it. You can sub coconut oil or butter for the olive oil (just melt the butter in a small saucepan before combining with other wet ingredients). Try orange zest instead of lemon, or omit the zest all together. Cinnamon, nutmeg or cocoa powder can be used instead of cardamom. If you don’t have dates – raisins, dried cherries, or even chocolate chips can be added as a mix in – but add these after you cook the granola. If the dried fruit is fairly small (like raisins or blueberries), no need to chop it up. But if it is larger (like dried mangoes or cherries), dice it so it integrates more thoroughly into the granola. 

Once you make granola yourself, there is no going back to store-bought!

Ingredients

2 cups old fashioned oatmeal

1 ½ cup nuts or seeds, roughly chopped – I typically use ½ cup of peanuts, ½ cup of pumpkin seeds, and ½ cup of sesame seeds 

¼ cup tahini

¼  cup maple syrup

¼ cup olive oil

1 tablespoon vanilla extract

Zest and juice of 1 lemon

1 teaspoon cardamom

1 cup medjool dates, pitted and chopped

Pinch of salt

Directions

Preheat the oven to 300 degrees and line a baking sheet with parchment paper.

Mix oatmeal, nuts/seeds, cardamom and lemon zest together in a large bowl.

Mix olive oil, maple syrup, tahini, vanilla and lemon juice together in a small bowl. 

Pour the wet ingredients into the dry ingredients and stir thoroughly to combine. The mixture will look pretty wet and that’s good – no one likes a bland granola. 

Spread the oat mixture on the baking sheet lined with parchment paper and smooth out so it evenly covers the pan – you want the granola to be flat so it cooks evenly.

Bake at 300 degrees for 30-35 minutes. Check around 15 minutes and turn the pan around so the granola is cooked evenly – yours may need a little more or less time depending on the temperature of your oven. 

Once the granola starts to look golden, pull out of the oven and leave on the pan to cool. This ensures large clumps stay together after baking. If you prefer a looser granola, this is the time to stir to break up those clumps before it cools and hardens. I’ll judge you from afar. 

Once the granola is cool,  add the chopped dates to the mixture before storing in an airtight container. The granola will keep for a week in an air-tight container – good luck making it last the entire week!

Perfect for breakfast, lunch, snack time….anytime!

lazy lasagna

Pandemic Pasta at its finest

I’ve been craving lasagne, and basically every comfort food under the sun, during the COVID-19 pandemic. My brother made a lasagne for Super Bowl Sunday and I have been fantasizing about it since then. Yes, I have been thinking about lasagne for 2 months. Don’t judge me. 

My mom makes an incredible meat lasagne that has a rich, creamy, bechamel sauce – basically my last supper. But when I started making lasagne for myself, I never felt like making a bechamel sauce. What can I say, sometimes I am lazy. Lasagne already has a ridiculous amount of cheese, so I don’t really miss the extra flour and butter. But to make sure the lasagne stays moist (everyones favorite word!), I add about a cup of milk or cream to the tomato sauce in lieu of the bechamel. 

I insist you use a 9 x 13 inch pan. Don’t use a smaller pan. If you do, I can predict what will happen – the lasagne will overflow with the sauce bubbling down onto the bottom of the oven, where it will start to burn, and then your fire alarm will go off…How do I know this? Because I have done it more times than I can count.  My sacrifice is your gain. 

If you don’t have a 9 x 13 inch pan, pick a larger pan. Layer the lasagne tightly along the side of one edge of the pan – you can create a makeshift edge with folded aluminum foil, so the edge of the lasagne stays tight. I use my 10 x 13 inch pan but still get a nice edge on my lasage using this method, instead of lasagne guts all over.  I don’t know about you, but the reason I make lasagne instead of a baked ziti is for presentation. Even if the only people that see it are myself and F. 

Ingredients

1 ½ pounds grass fed ground beef

1 large or 2 small fennel bulbs, diced (onion works great too!)

5 cloves of garlic, sliced

1 32 ounce can of tomato sauce

1 cup of milk or cream

1 teaspoon red pepper (if you don’t love spicy food, you can omit)

salt and pepper, to taste

1 cup parsley, chopped

16 ounces whole milk ricotta cheese

1 large egg

2 cups grated mozzarella

1 cup grated parmesan

1 box of lasagne noodles of choice

Directions

Heat a large saucepan or dutch oven on the stove over medium heat. I don’t recommend using cast iron pan here, tomato sauce and cast iron don’t mix.

After the pan is hot, add the ground beef and spread it around the pan. Then don’t touch the meat! You want to get a crust on one side so be patient. This can take anywhere from 2-5 minutes depending on how hot your pan is. 

Once the meat is brown on one side, flip it over. Add the diced fennel, sliced garlic, salt, black and red pepper (if using). Combine everything and cook for another 5 minutes, stirring occasionally to make sure nothing is sticking to the pan. 

Once you smell the garlic and fennel, add the canned tomato sauce and give everything a stir. Turn down the heat to low, cover the pan and cook for about 40 minutes, checking the sauce every ten minutes to stir.  Add the milk/cream at the end of the 40 minutes and do a taste test. Add more salt and pepper if needed. Turn off the stove and the sauce can hang out while you make the other components. 

Mix the ricotta, chopped parsley and egg into a bowl.

Grate the mozzarella and parmesan cheese together and set aside in another bowl. 

Make the noodles. You can just follow the directions on the package. Lasagne noodles tend to stick together (and can be a pain in the ass), so add a little olive oil and stir the pot frequently. After cooking and rinsing with cold water, lay the noodles out on a plate instead of keeping them in the colander. Then they will be separated and ready to use when you are ready to layer!

Preheat the oven to 350 degrees. Lightly oil or butter a 9 x 13 inch baking pan, or larger pan if using (if using a larger pan, see my note above). Spread a layer of tomato sauce on the bottom of your pan ~ ¼ of the sauce. Layer 5 noodles evenly across the bottom of the pan.  

Add ⅓ of the ricotta mixture and spread across the noodles. Sprinkle ⅓ of the cheese mixture on top of the ricotta. Add ¼ of the remaining sauce on top of the cheese. Layer another 5 noodles evenly on top and repeat two more times – you will have a total of three layers. 

If you are using a pan larger than 9 x 13 inches, this is where you insert the folded aluminum foil along the side of the lasagne that is exposed. Make sure it is snug, otherwise sauce will leak. Cover the lasagne with aluminum foil before putting in the oven. 

Bake in the oven for 45 minutes. Remove the aluminum foil cover during the last 15 minutes so the top gets some color. Let cool for 20 minutes – this helps the layers stick together and when you cut it into slices, you get the instagram shot. 

do you have a favorite lasagna recipe?

buckwheat pancakes

PB&J meets Pancake, an homage to my father

I can recall only two dishes my dad made for us when we were growing up. One was peanut butter & jelly sandwiches… or peanut butter & jelly graham crackers, peanut butter & jelly rice cakes, you get the idea. I’ve inherited his love – nay, obsession – with all things peanut butter, which manifests as a daily snack of peanut butter & apple. They say you are what you eat so my veins must be running with Skippy crunchy-style, or more recent years, Trader Joe’s creamy or crunchy-style. I don’t really discriminate unless the peanut butter is unsalted. Unsalted is just gross. You cannot convince me otherwise.  

The other item my dad would make us when we were younger was pancakes! Usually from a box, but we didn’t care. When the stack of fluffy pancakes moved from the kitchen to the table, we attacked like hyenas fighting for scraps on the sahara. We were plenty well fed, but growing up in a family of three meant you had to be fast when food landed on the table.

As an homage to my dad, I decided to make an apple compote and dollop of peanut butter topping. The compote is made with just enough sugar to caramelize and a hit of lemon. I am not a fan of overly sweet breakfasts, so if you need to add  an extra teaspoon of sugar, go for it. I use apples for the compote, but use whatever fruit you have in your kitchen – plums, cherries, or pears or whatever! It’s pretty hard to mess up a compote as long as you stir frequently on a low heat and wait for the fruit to break down into a jam-like consistency.

It’s standard over here for me to use a non-traditional flour. I decided to go with buckwheat flour, which is naturally gluten-free, and adds a rich, nutty and earthy flavor. I don’t like to say I am gluten-free (because that would be very Californian of me), but I do notice my digestion and skin are happier when I use buckwheat, rice, tapioca or even coconut instead of wheat flour in my baking.  

With that being said…. I will never say no to bread, especially fresh baked sourdough from a bakery, but I try to stay away from baked goods from a plastic bag. If you’re curious why, I recommend the Netflix documentary series “Cooked,” which is based on Michael Pollan’s 2013 book, Cooked: A Natural History of Transformation. In the third episode, “Air,” Pollan explores the science behind bread making and gluten, and examines the current bread making process, where additives in industrialized bakeries are seen as the root of the cause for the reason people have become sick from breads. This episode makes sense to me because the number of people with gluten-intolerances seems crazy high in light of humans eating bread for thousands of years. Maybe this will inspire you to hit up your local bakery for some fresh bread instead of pre-packaged bread from the store!  

Ingredients

For the pancakes

1 cup buckwheat flour

2 tablespoon coconut sugar

½ teaspoon baking soda

½ teaspoon baking powder

1 tablespoon of cinnamon

pinch of salt

⅓ cup olive oil

1 large egg

1 cup yogurt

For the compote

1 pound apples, diced

1 tablespoon butter

1 tablespoon coconut sugar

zest of 1 lemon and the juice

Directions

Make the compote. Place a small saucepan on the stove over low heat.  Add the diced apples, butter, and sugar. Let simmer over the stovetop and stir frequently to ensure that the mixture doesn’t stick to the bottom of the pan.  You can cook this for a minimum of 30 minutes or up to an hour. The fruit should lose its shape and morph into a jam-like consistency. Once your compote is done, add the lemon zest and juice, stir and remove from heat.

Time for pancakes. Preheat the oven to 200 degrees. Grab an oven-safe plate or cookie sheet. When you finish the first batch, put the pancakes on the plate or pan and keep them in the oven. Add the other pancakes batches to the oven as you go. This strategy ensures the pancakes are still warm when you are ready to serve!

Heat up a large cast iron on the stove top using the medium setting.  I prefer to use a cast iron because it gives the pancakes a nice crust but if you have a non-stick pan that will be fine. I’ll wax-poetic about cast irons another time…

Mix together dry ingredients in a large bowl using a wooden spoon. Mix together wet ingredients in a smaller bowl. Add the wet ingredients to the dry ingredients and stir just enough to combine. Lumps are your friend.

Add butter to the cast iron.  If the butter browns too quickly and starts to burn, turn down the heat. We want the butter melted but no burnt butter. If the butter burns, take the cast iron off the stove top, wipe out the pan, and start again.  

The size of pancakes is a very personal choice.  I typically use a tablespoon to place a heaping spoonful of batter in the pan.  You can make the pancakes smaller or larger depending on your preference. Don’t overcrowd the pan.  I can fit either 4 small or two large pancakes in my 10-inch cast iron comfortably.

Once the pancake batter is in the pan, keep an eye on it! I check after 1-2 minutes but may take up to 5. You are looking for tiny bubbles on the top and golden edges. When this is happening, I use a spatula to gently flip the pancake. The second side will take another 1-2 minutes to finish. Slide the first batch of pancakes into the oven to keep them warm while you finish making the rest of the pancakes. 

If needed, add more butter to the pan and continue dropping batter and flipping after 1-2 minutes. After each batch is complete, add the pancakes to the oven to stay warm. After you have used up all of your batter, you can take all of the pancakes out of the oven and turn the oven off. Stack the pancakes 3-4 high, top with desired amount of compote, a dollop of peanut butter, maple syrup and serve.

what’s your favorite pancake topping? 

grandma chicken

It’s practically Perle-fect

My grandmother Perle taught me many important life lessons, but most of all, she taught me how to cook. My earliest memories with Grandma are watching her move around in a confident flurry, whipping up dishes for us to devour. She showed me how to use a gentle hand when making matzah balls so they don’t become dense. We put together crackers topped with Kosher salami and cheddar cheese and broiled to perfection in the toaster oven. Sometimes, we busted out the food processor and whipped up the ever polarizing chopped liver, which I decided to stop eating at age seven after my Uncle Jan told me what the liver actually did… It took me a while to get over that, and during that time, Grandma concocted a vegetarian version that included eggs, fried onions, and peas and while it sounds bizarre, it was actually pretty delicious. 

But, the classic Grandma dish is what we affectionately call Grandma Chicken. We ate this chicken almost every Friday night for Shabbat, and all of the matriarchs in my family make this recipe (and a brisket, just in case there isn’t enough food) for the Jewish holidays. If you’re used to roasting a chicken whole, it’s a simple dish. If roasting a whole chicken sounds scary, you can also just use chicken parts and it will still come out delicious. 

The real star of this recipe is the paprika. Grandma used a sweet Hungarian paprika but I prefer the smoked hot paprika, because well, some like it hot. It doesn’t matter if it’s from Hungary or Spain but I recommend getting a nicer paprika.  My favorite spice shop is Whole Spice at Oxbow Market in Napa, but if you’re not planning a day of drinking in Northern California (which you should be), you can also order from them online: https://wholespice.com/

My twist on her recipe is to salt the chicken one to two days before you pop it in the oven. This helps for optimal juiciness. Whether you remember to add the salt in advance or not, it’s delicious. But with a little planning, it will be next level. 

Ingredients

1 3 ½ – 4 pound chicken, ideally from the butcher, or farmers market. I always buy chicken that is organic, air chilled and antibiotic free. The better chicken you buy, the less you have to do to make it delicious. Here’s a great article from Bon Appetit about the best chicken to buy and why: https://www.bonappetit.com/story/best-chicken-to-buy

½ tablespoon each paprika, black pepper, and garlic powder

A couple tablespoons of water. 

¾ teaspoon per pound of kosher salt. For a 3 ½ pound chicken, you will need 2 ¼ teaspoons of salt, and for a 4 pound chicken, you will need 3 teaspoons of kosher salt.

Directions

1-2 days before you want to roast the chicken: pat the chicken dry and rub kosher salt all over the skin and in the cavity (amount of salt depends on the size of your bird – see above for guidance)

Put the chicken on a plate, and leave uncovered in the fridge for 1-2 days. 

When you are ready to roast the chicken, take it out of the fridge.  Combine paprika, black pepper and garlic powder in a small bowl, and gradually add water one tablespoon at a time until it forms a paste.

You want to add just enough water so the spices combine, but not so much that the paste becomes runny. 

Rub the paste all over the whole chicken, including inside the cavity.

Transfer the chicken to a roasting pan or large ovenproof skillet. My favorite is to use a 12 inch cast iron. Or I use my 15 inch cast iron and snuggle the chicken amongst large cubes of sweet potatoes. 

Roast the chicken at 425 degrees for 1 hour, or until the juices run clear when you pierce the thigh. If you have a meat thermometer, chicken is done at 165F. If you don’t, just make sure those juices really run clear – you don’t want to serve salmonella with undercooked poultry.

Let chicken rest for a minimum of ten minutes and up to 1 hour. The longer time it has to rest, the better chance the juices have to reincorporate into the meat and not end up all over your cutting board. 

Carve the chicken into pieces and serve. I usually pair the chicken with roasted sweet potatoes and a mixed green salad.